Table of Contents
Introduction
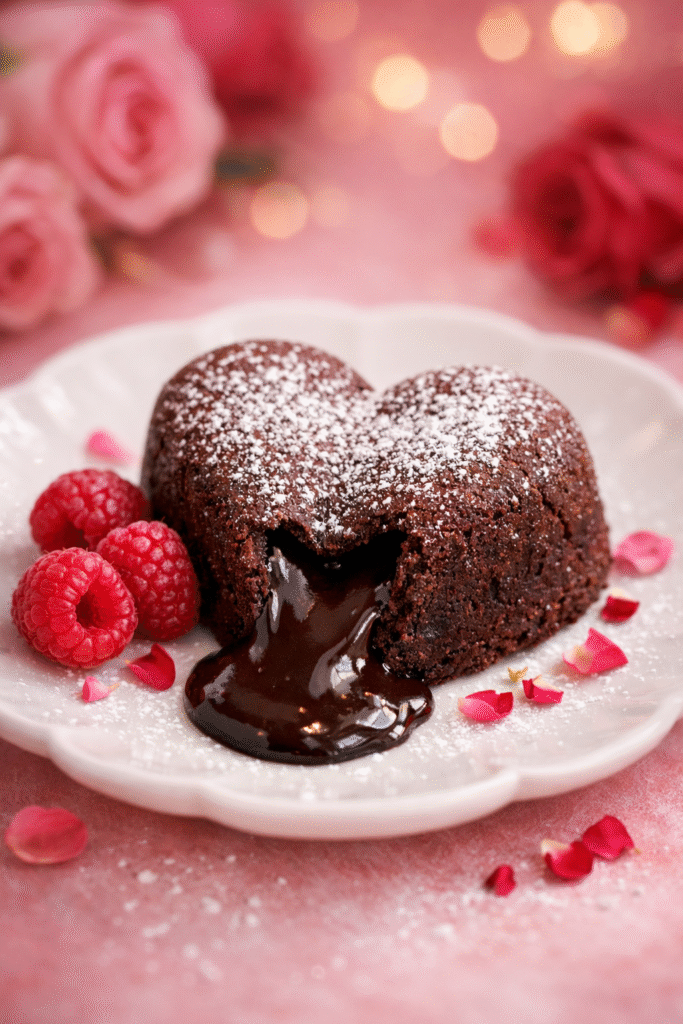
Hey dessert lovers! Whether you’re celebrating Valentine’s Day, throwing a fun Galentine’s Day brunch, or just indulging in some well-deserved self-love, you’re in for a seriously chocolatey treat. Today, we’re diving into the magical world of Chocolate Lava Cake — a dessert that’s equal parts elegant and cozy, with a surprise molten chocolate center that spills out like pure happiness every time you cut in. 🍫💖
Imagine this: a warm, soft cake on your plate, the aroma of rich chocolate filling the room, and that first spoonful melting perfectly in your mouth. It’s comfort, indulgence, and a little touch of luxury all rolled into one bite. Whether you’re baking for a special someone, a group of gal pals, or simply for yourself, this dessert has a way of making any moment feel special. 🥰
Chocolate Lava Cake might look fancy, but it’s actually surprisingly simple. Originating in the late 1980s, the dessert was popularized by chef Jean-Georges Vongerichten in New York, where diners fell in love with its decadent gooey center and elegant presentation. And honestly? It’s still as captivating today — with just a few ingredients, you can create a dessert that looks like it belongs in a five-star restaurant but tastes like a warm hug. 💌
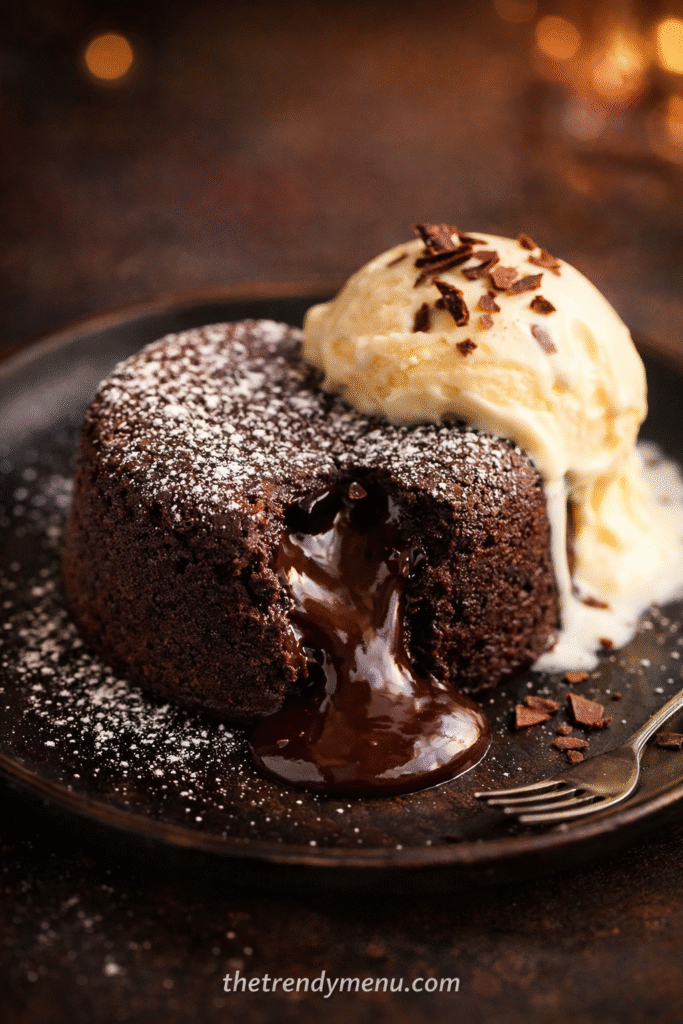
Pair it with a scoop of creamy vanilla ice cream, a dusting of powdered sugar, or even fresh berries for that extra “wow” factor 🍓✨. Picture the smiles as you share it with your loved ones on a romantic night in, a Galentine’s gathering filled with laughter, or a cozy evening where the only thing you’re committing to is chocolate bliss.
And here’s the best part — whether you’re a baking newbie or a seasoned dessert pro, this recipe guides you step-by-step to a show-stopping dessert that will leave everyone asking for seconds (and maybe even thirds 😏). So, roll up your sleeves, put on your favorite apron, and get ready to whip up a little chocolate magic. Because when molten chocolate meets love, magic happens — and trust me, you’re about to become the ultimate dessert hero in your own kitchen. 💕🍫💫
Budget Information
Let’s talk about budgeting, because who doesn’t love a delicious treat that won’t break the bank? Here’s a quick breakdown of the cost of each ingredient needed for our Chocolate Lava Cake:
- Dark chocolate (70% or more): $3.00 for an 8 oz bar
- Unsalted butter: $2.00 for a stick (approx. ½ cup)
- Granulated sugar: $0.50 for ½ cup
- Eggs: $2.00 for 2 large eggs
- All-purpose flour: $0.30 for ¼ cup
- Vanilla extract: $0.50 for 1 tsp
- Salt: negligible, around $0.05
Approximate Total Cost: $8.35
This decadent dessert is not only delicious but also budget-friendly. With just a handful of pantry staples, you can create a dessert that feels luxurious without the extravagant price tag. Perfect for those evenings when you want something special and satisfying without burning a hole in your wallet!
Why This Recipe Works
So… why is this Chocolate Lava Cake basically magic in dessert form? Let me spill the chocolatey tea! ☕🍫
First up, it’s all about the rich, decadent flavor. High-quality dark chocolate + butter = pure indulgence that melts in your mouth and warms your heart. ❤️ The best part? This recipe is beautifully simple — no fancy techniques, no rare ingredients — just straight-up chocolate bliss that anyone can create.
Next, it’s totally versatile! Want a lighter twist? Swap some butter for a nut butter or your favorite alternative. Craving even more chocolatey goodness? Toss in chocolate chips and watch that molten center get extra dreamy. 🍫✨ You can easily tweak it for dietary needs or personal flavor adventures — it’s basically a canvas for your dessert creativity.
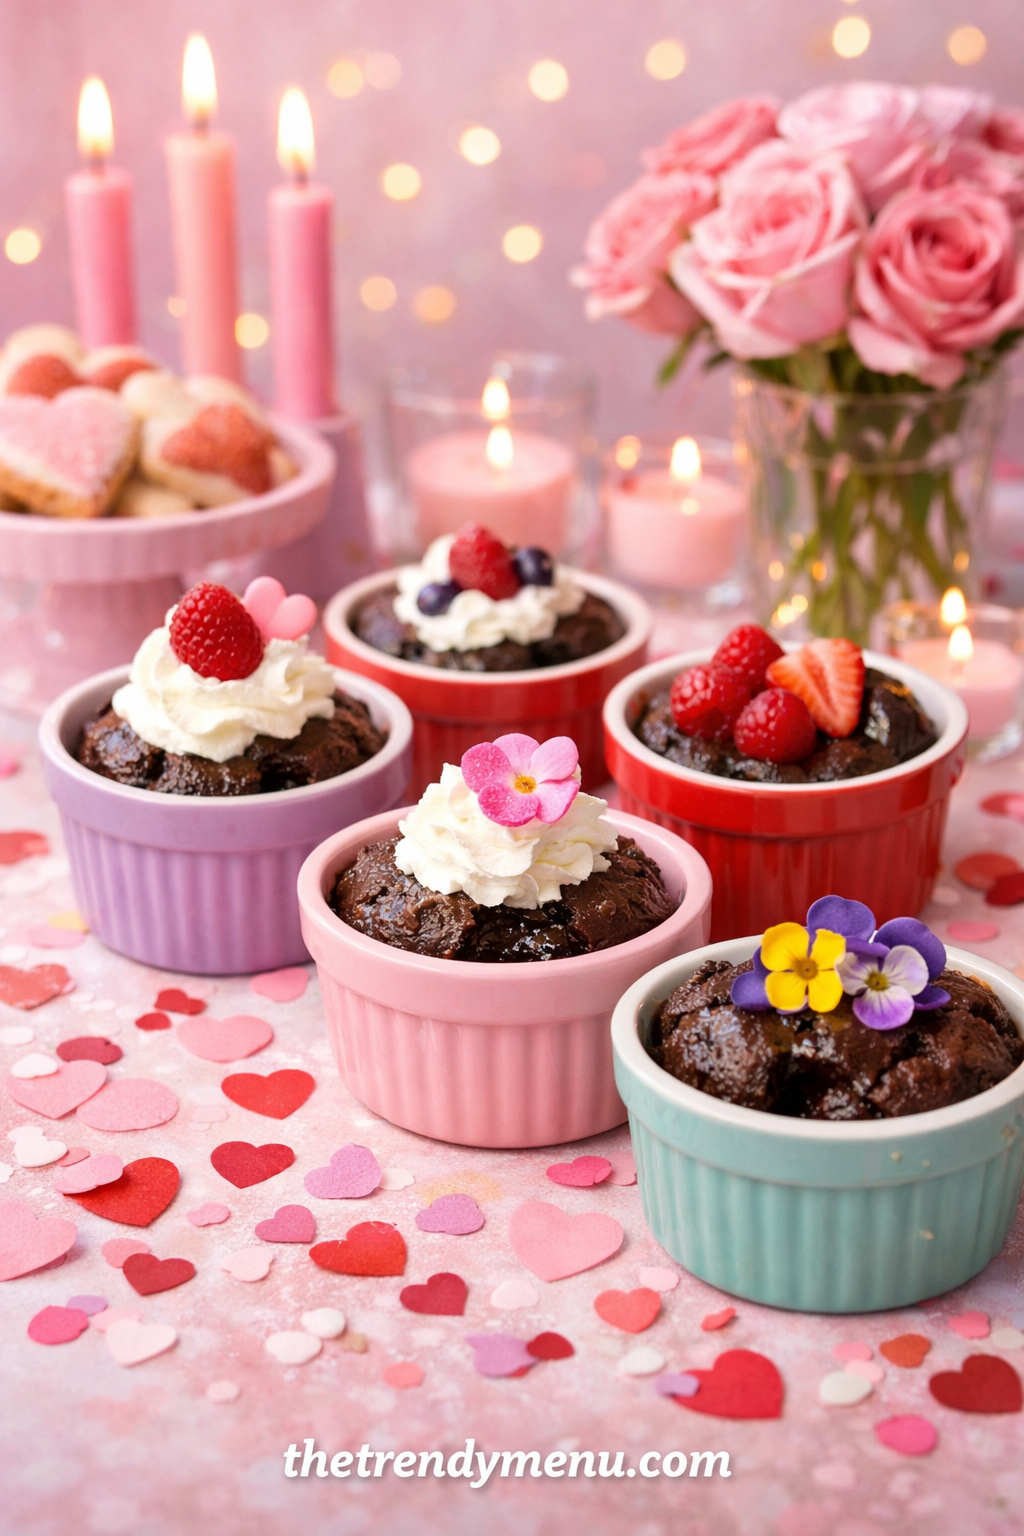
And let’s talk about sharing the love: this cake is perfect for cozy nights in, romantic date nights, Galentine’s gatherings, or even a fun kitchen activity with the kiddos. 👩🍳👨🍳 Everyone loves a little chocolate indulgence, and the ooey-gooey center makes it feel extra special. Bonus? The presentation is effortlessly impressive — your guests will think you’re a professional pastry chef, even if you whipped it up in your PJs. 😏💖
One bite of that molten, chocolatey heart and trust me… your friends, family, or sweetheart won’t stop raving. This dessert doesn’t just satisfy cravings — it creates moments, memories, and maybe a few happy food squeals along the way. 🥰✨
Ingredients + Optional Substitutions
Here’s what you’ll need to create your Chocolate Lava Cake, along with possible substitutions to fit various preferences:
- 4 oz dark chocolate (at least 70%)
Substitution: You can use semi-sweet chocolate for a sweeter cake or milk chocolate for a milder flavor. - ½ cup unsalted butter
Substitution: Coconut oil or a dairy-free butter alternative for vegan options. - ½ cup granulated sugar
Substitution: You can opt for brown sugar to enhance the flavor depth. - 2 large eggs
Substitution: Flax eggs (1 tbsp ground flaxseed + 2.5 tbsp water = 1 egg) for vegan alternatives. - ¼ cup all-purpose flour
Substitution: Almond flour for gluten-free versions. - 1 tsp vanilla extract
Optional: A pinch of espresso powder to amplify the chocolate flavor. - ¼ tsp salt
Optional: Sea salt for garnishing to enhance flavor.
Note: Additional toppings such as powdered sugar or whipped cream can also be added for serving!
Equipment
To prepare your Chocolate Lava Cakes, you’ll need some essential tools to make your baking experience smooth and enjoyable:
- Oven
- Mixing bowls
- Microwave-safe bowl or double boiler
- Whisk
- Rubber spatula
- Measuring cups and spoons
- Individual ramekins (6 oz size) or muffin tin
- Baking spray or butter (for greasing)
- Cooling rack
Step-by-Step Recipe Instructions
Now, let’s get into the delicious details! Here’s a step-by-step guide to creating your Chocolate Lava Cake from scratch. Get ready for some mouth-watering magic!
Yield: 4 individual lava cakes
Step 1: Preheat Your Oven
Preheat your oven to 425°F (220°C), ensuring it reaches the right temperature for that perfect rise. Preheating is crucial as it allows for even cooking. While your oven warms up, you can prepare your ramekins or muffin tin.
Step 2: Prepare the Ramekins
To prevent your luscious lava cakes from sticking, generously grease your ramekins with butter or spray them with baking spray to ensure a seamless release. Place them on a baking tray for easy handling, as they will be quite hot when you take them out of the oven.
Step 3: Melt the Chocolate & Butter
In a microwave-safe bowl, combine the dark chocolate and unsalted butter. Microwave on medium power in 30-second intervals, stirring in between until smooth and completely melted. Alternatively, you can melt them using a double boiler on low heat. The mixture should be glossy and silky, with a rich aroma filling your kitchen. If you prefer, you can also add a pinch of espresso powder at this stage to deepen the chocolate flavor.
Step 4: Mix in the Sugar
Once your chocolate and butter mixture is smooth, remove it from heat and whisk in the granulated sugar. It should blend into the chocolate, creating a rich, silky base. This mixture should be warm to the touch but not boiling — we want to keep the eggs from scrambling in the next step!
Step 5: Add the Eggs
Next, gently whisk in the eggs one at a time, ensuring they are fully incorporated before adding the next. The warmth of the chocolate mixture will help lighten the eggs, making them easier to blend. Once you have a unified batter, you’ll notice the color darkening and the mixture becoming thick and smooth — absolutely delicious!
Step 6: Incorporate the Flour and Salt
Sift in the all-purpose flour and salt, folding it into the batter with a rubber spatula. Be careful not to overmix; you want just enough incorporation to avoid lumps. The batter should be glossy and thick. This is your secret weapon in creating that decadent molten center!
Step 7: Fill the Ramekins
Pour the batter evenly into the prepared ramekins, filling each about 2/3 full to allow room for rising. Don’t overfill, as the cakes will puff up! If you’re using a muffin tin, make sure to fill each cavity to the right level for optimal results.
Step 8: Bake to Perfection
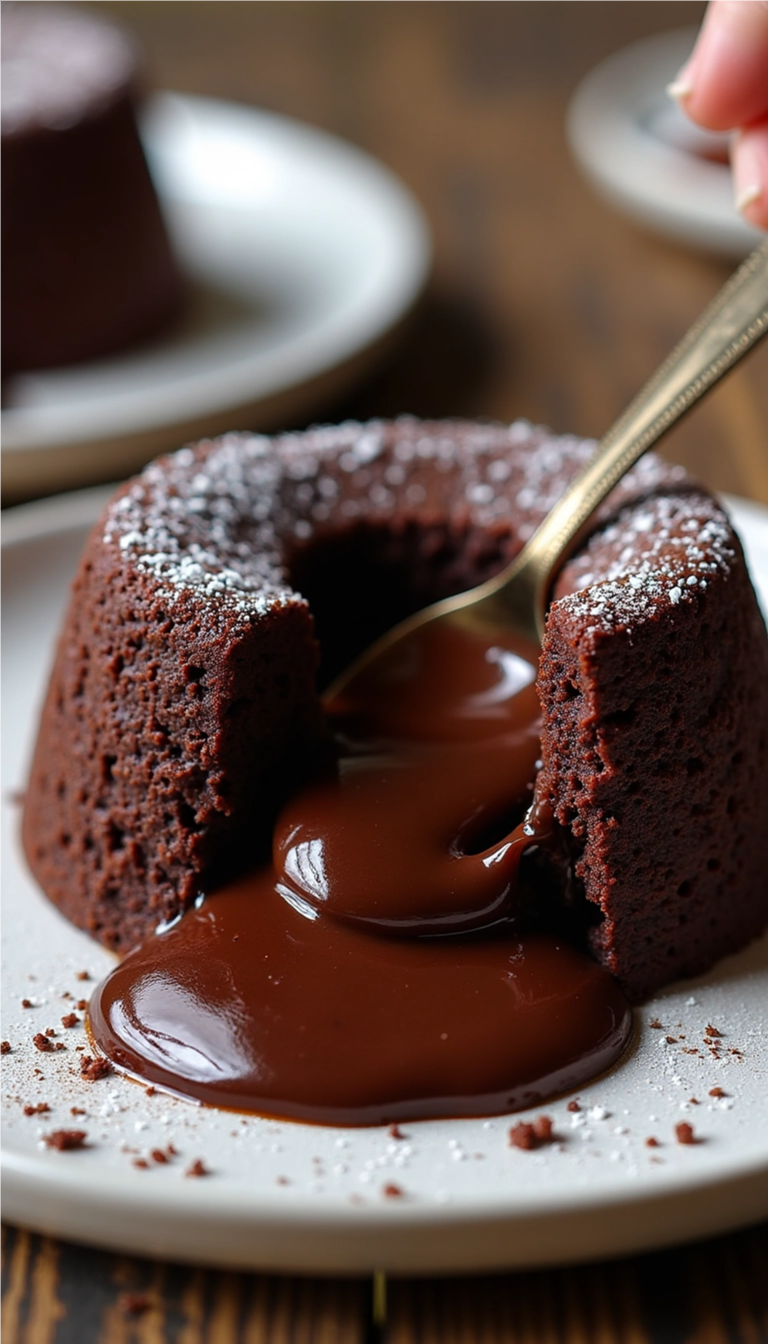
Now, carefully place your filled ramekins or muffin tin in the preheated oven. You’ll want to bake for 12-14 minutes until the edges are set but the centers remain soft. The tops should look slightly puffed but shiny, like a delicate chocolate cloud. If you’re unsure, shimmy one in the oven — they should be firm to the touch on the outside but still yield slightly.
Step 9: Cool Briefly
Once out of the oven, let the ramekins cool for about 1 minute. While still warm, run a knife around the edges to help release them. You want to free the cakes but not let them cool too much; it’s all about timing for that perfect molten center!
Step 10: Serve with a Flourish
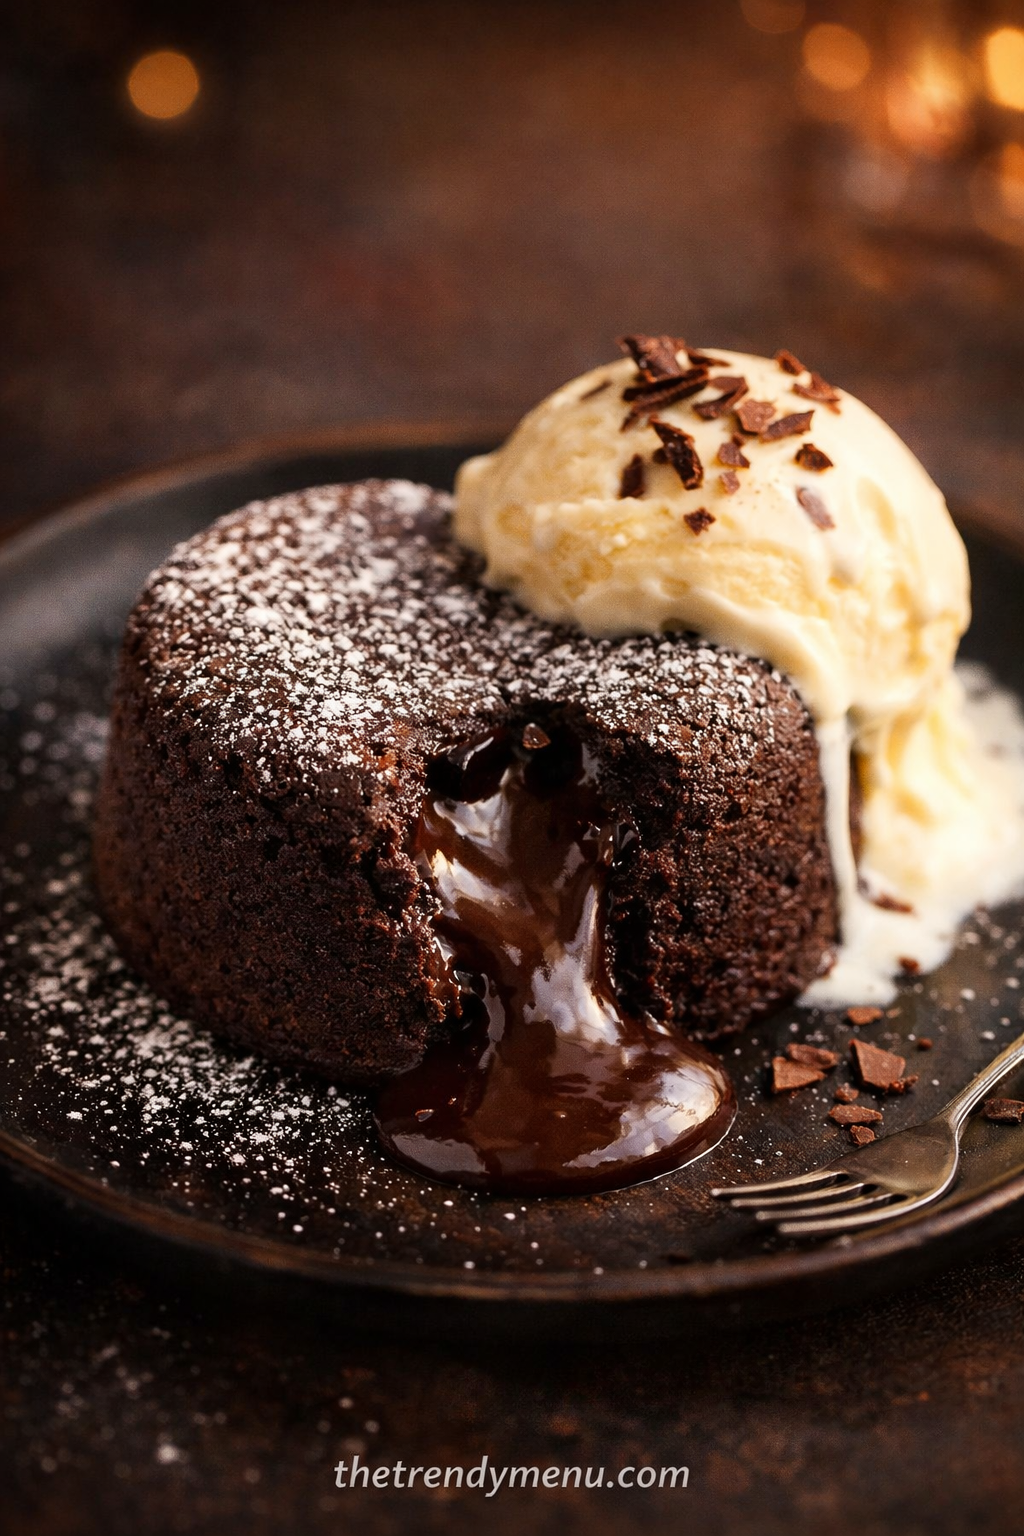
Now comes the best part! Invert the ramekins onto a dessert plate, gently removing to reveal the cake. The center should ooze goodness, ready to be garnished. Dust with powdered sugar or add a dollop of whipped cream for that gourmet touch. Serve with a scoop of vanilla ice cream for a contrast that delights every taste bud.
Enjoy your creations fresh out of the oven for the ultimate lava experience!
Chocolate Lava Cake
-
Prep Time: 10–16 minutes
(includes greasing ramekins, melting chocolate & butter, mixing sugar, eggs, flour, and filling ramekins) -
Cook Time: 12–14 minutes
(oven baking at 425°F / 220°C) -
Cool Time: 1 minute
(brief cooling in ramekins before serving) -
Total Time: 23–31 minutes
(prep + cook + brief cooling; doesn’t include optional garnishing, which adds ~2–3 minutes)
Nutritional Facts
Here’s a rough nutritional breakdown for a single serving of Chocolate Lava Cake, assuming the recipe yields four servings:
- Calories: 340
- Protein: 5g
- Carbohydrates: 36g
- Fat: 20g
- Fiber: 1g
- Sugar: 25g
- Sodium: 180mg
Dietary Tags: Gluten-Free (if using gluten-free flour), Vegetarian, Desserts.
Storage and Reheating Tips
Alright, let’s chat about what to do with any leftovers (if there are any!). Chocolate Lava Cake is best enjoyed fresh, but if you find yourself with some left, here’s how to store and reheat:
- Fridge: Store in an airtight container for up to 3 days.
- Freezer: Yes! You can freeze the batter or the baked cakes. They’ll keep well for about 2 months.
- Best Containers: Glass or plastic airtight containers are ideal to maintain moisture and flavor.
Reheating Methods:
- Microwave: Place on a microwave-safe plate, cover with a damp paper towel to prevent drying, and heat for about 30-60 seconds until warm.
- Oven: Preheat the oven to 350°F (175°C), place the cakes on a baking tray, and heat for around 5-7 minutes, until warmed through.
- Stovetop: In a non-stick skillet set over low heat, cover and reheat the cakes for 4-5 minutes until warm.
- Air Fryer: Preheat your air fryer to 320°F (160°C), place the cake in for 4-5 minutes, making sure not to overheat.
For the best results, avoid overcooking during reheating to keep that gooey chocolate center intact.
Serving Suggestions
When it comes to serving, let your creativity soar! Pair your Chocolate Lava Cake with:
- A refreshing scoop of vanilla ice cream or whipped cream
- A sprinkle of fresh berries for a pop of color and tartness
- Drizzle with caramel or chocolate sauce for that extra indulgence
- Serve them warm alongside a cup of rich espresso or a glass of dessert wine for a luxurious dining experience.
Each of these pairings beautifully complements the deep flavors of the chocolate and enhances the overall experience. You can also serve it with a side of fresh fruit like strawberries or raspberries to balance the richness!
Reader Tips or Helpful Notes
Now, let’s share some of my top tips that have been tried and tested through the years:
- Use Quality Chocolate: Invest in good quality dark chocolate for the richest flavor.
- Check Your Oven: Oven temperatures can vary; if unsure, consider purchasing an oven thermometer for accurate baking.
- Don’t Overmix: When adding flour, mix just until incorporated to avoid tough cake.
- Chill Your Ramekins: For a firmer center, chill the filled ramekins before baking.
- Practice Timing: Keep an eye on baking for the perfect molten center; even a minute can make a difference!
- Experiment with Flavors: Try adding orange zest or almond extract for a flavor twist.
- Microwave Melt Method: For chocolate melting, a double boiler is the safest for preventing burning.
- Always Taste: Sample your batter before baking; this helps gauge sweetness and balance flavors.
- Garnish with Flair: A sprinkle of sea salt on top can enhance the chocolate flavor magnificently!
- Keep Leftovers Moist: Cover any leftovers to maintain freshness; a slice of bread in the container can help keep things from hardening.
Recipe FAQs
Q1: Can I make the batter ahead of time?
Absolutely! You can prepare the batter and refrigerate it for up to 24 hours. Just remember to bring it to room temperature before baking.
Q2: Can I use mini ramekins?
Yes! You can use smaller ramekins for individual servings; just reduce the baking time by a couple of minutes and monitor closely.
Q3: What if I don’t have ramekins?
No worries! You can use a muffin tin instead; adjust your baking time to fit.
Q4: Can I make these without eggs?
Yes, you can substitute eggs with flax eggs for a vegan option, but do expect a different texture.
Q5: How do I know when they’re done?
The edges should be set but the center should still be soft and wobbly; if you poke it, it should feel firm but still spring back.
Q6: What’s the best way to serve them?
These cakes are best served warm and can be plated with ice cream, toppings, or garnished with fresh fruit for a chic finish.
Conclusion
Printable Recipe Card
Want just the essential recipe details without scrolling through the article? Get our printable recipe card with just the ingredients and instructions.


Comments