Table of Contents
Introduction
Hey there, baking besties and dessert enthusiasts!
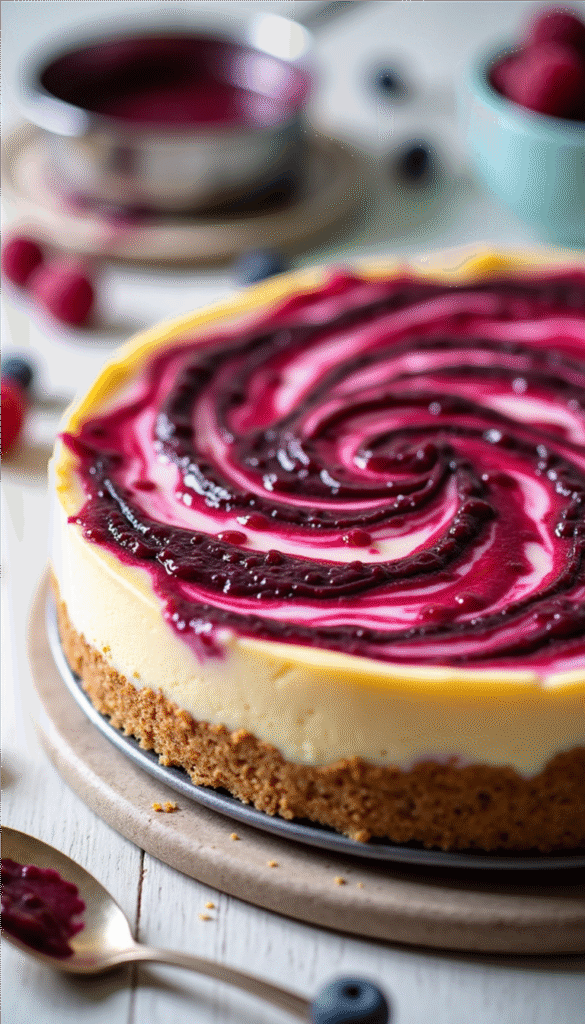
Okay, let’s set the scene. You’re cozied up, deep in a TikTok scroll, when you see it: a mesmerizing swirl of creamy cheesecake and vibrant berry sauce, twisting together like a delicious edible tornado. It’s not just a dessert; it’s a performance in a pan. The Viral TikTok Baked Feta Berry Cheesecake Tornado has taken the world by storm, and if you’ve ever felt a pang of “I could never make that,” I’m here to tell you that you absolutely can. This isn’t just about following a recipe; it’s about creating a piece of social media magic in your own kitchen. It’s the perfect dessert for when you want to impress at a dinner party, become the star of a potluck, or simply treat yourself to a baking project that’s as fun to make as it is to eat. Get ready to unleash your inner pastry chef and create a dessert that’s truly a feast for the eyes and the soul.
This isn’t just a dessert; it’s a whole experience. Imagine a velvety, luxuriously smooth cheesecake filling with a subtle, sophisticated tang that makes you go, “Hmm, what is that magical secret ingredient?” paired with a burst of sweet-tart berry compote that cascades over a buttery, crumbly crust. It’s the kind of dessert that feels incredibly chic and gourmet but is crafted with a fun, fearless, and fuss-free energy. I love serving this at dinner parties to watch my friends’ eyes light up with the first bite, or bringing it to a family gathering where it instantly becomes the centerpiece of the table. It’s more than a treat; it’s a moment.
Why You’ll Love This Recipe
Let’s get real: we all love desserts that scream “wow” without demanding a culinary degree. This protein-packed cheesecake tornado does just that.
-
Protein Boost: Thanks to blended cottage cheese, you get a creamy, dreamy texture while sneaking in more protein—because indulgence doesn’t have to mean guilt.
-
The Tornado Factor: Swirling the berry sauce into the cheesecake creates beautiful pockets of fruity flavor in every single bite—each slice is a masterpiece.
-
Feta Magic: That subtle feta tang cuts through the sweetness for a sophisticated flavor combo that keeps you coming back for more.
-
Beginner-Friendly: Swirls may vary, but every tornado is uniquely gorgeous. Even novice bakers can make this look Pinterest-worthy.
-
Customizable: Go with mixed berries, or try mango, peach, or even passion fruit for a fun twist.
Budget Information
Creating a viral-worthy dessert doesn’t mean blowing your budget! This cheesecake tornado is surprisingly economical, especially considering it serves 10-12 people. It’s a luxurious treat without the luxury price tag.
-
-
Graham Crackers (200g): ~$2.50
-
Butter (100g): ~$1.00
-
Cream Cheese (250g) + Cottage Cheese (250g): ~$5.00
-
Feta Cheese (200g): ~$3.50
-
Sugar (120g): ~$0.50
-
Eggs (3 large): ~$0.75
-
Vanilla Extract: ~$0.50
-
Fresh Berries (200g): ~$4.00 (frozen is totally fine!)
-
Fresh Mint (garnish): ~$1.00
Who says viral desserts have to break the bank? This cheesecake tornado serves 10–12 people and is surprisingly wallet-friendly:
Approximate Total Cost: ~$18.75. a luxe-looking dessert that’s totally budget-friendly and Instagram-ready. 💸✨For under $20, you can create a dessert that looks and tastes like it came from a high-end patisserie! It relies on smart, affordable ingredients, with the feta and berries providing that gourmet flair. It’s a total win for your wallet and your Instagram feed.
-
Why This Recipe Works
This recipe took over TikTok for a reason—it’s a flawless blend of stunning visuals and foolproof flavor.
-
The “Tornado” Technique is Magic: The method of swirling the berry sauce into the cheesecake batter isn’t just for looks; it creates pockets of intense fruity flavor in every single bite, ensuring a perfect ratio of cheesecake to berry in each slice. ✨
-
Feta is the Secret Weapon: Don’t be scared! The feta cheese doesn’t make it taste savory. Instead, it adds a subtle tangy depth that cuts through the richness of the cream cheese, preventing the dessert from being cloyingly sweet and creating a far more complex and sophisticated flavor profile than a standard cheesecake.
-
Incredibly Forgiving: The swirling technique is very beginner-friendly. There’s no “wrong” way to do it—every tornado is uniquely beautiful. The baking process is also more resilient than a traditional cheesecake, making cracks far less likely.
-
Total Customization: The berry base is your playground. Use a mix of strawberries, raspberries, and blueberries, or go for a single-berry blast. You can even experiment with other fruit purees like mango or peach for a different twist.
Ingredients + Optional Substitutions
(Yields one 9-inch cheesecake, serving 10–12 people)
For the Crust:
-
200g (1.5 cups) graham cracker crumbs
-
100g (7 tbsp) unsalted butter, melted
(Dairy-free option: swap butter for coconut oil—pairs beautifully with berries!)
For the Cheesecake Filling:
-
250g (1 block) full-fat cream cheese, at room temp
-
250g (1 cup) cottage cheese, blended smooth
-
200g (1.5 cups) feta cheese, crumbled
-
120g (2/3 cup) granulated sugar
-
3 large eggs, at room temp
-
1 tsp pure vanilla extract
For the Berry Tornado Swirl:
-
200g (1.5 cups) fresh or frozen berries (strawberries, raspberries, blueberries)
-
2 tbsp sugar
-
1 tbsp lemon juice
Garnish (Optional):
-
Fresh mint
-
Powdered sugar
-
Extra berries
Equipment
-
9-inch springform pan (The removable sides are essential for getting that perfect, clean slice!)
-
Food processor or a zip-top bag and rolling pin (for crushing the graham crackers)
-
Medium mixing bowl
-
Stand mixer with a paddle attachment or a large bowl and an electric hand mixer (You can mix by hand, but an electric mixer is key for a lump-free, aerated filling.)
-
Small saucepan
-
Spatula
-
Toothpick or thin skewer
-
Measuring cups and spoons
Step-by-Step Recipe Instructions
Yield: One 9-inch cheesecake, serving 10-12 people
1. Prepare the Pan and Preheat the Oven
Let’s get started by preheating your oven to 325°F (160°C). This step is crucial because a steady, consistent temperature is what gives you that creamy, luscious cheesecake texture—no cracks, no dry edges. While your oven warms up, grab your 9-inch springform pan. For extra peace of mind, lightly grease the bottom and sides. This isn’t mandatory because the buttery graham cracker crust usually does the trick, but it’s a nice safety net.
Next, place a round of parchment paper on the bottom of the pan before locking the ring into place. Trust me—this tiny trick is a game-changer for a flawless, Instagram-worthy slice. It ensures that your cheesecake lifts right out without any mishaps, giving you that perfectly clean presentation. Set your pan aside while we work on the crust and filling.
2. Create the Buttery Crust
Now it’s time for the foundation of your masterpiece! In a food processor, pulse the graham crackers until you have fine, even crumbs. You’re aiming for a texture like sand—no chunky bits. Don’t have a processor? No worries! Toss the crackers in a sturdy zip-top bag and crush them with a rolling pin until smooth.
Transfer the crumbs to a medium bowl and drizzle the melted butter over them. Use a fork to mix everything thoroughly, making sure each crumb is coated. The mixture should hold together when you pinch it—perfect! Pour the crust mixture into your prepared springform pan and press it down evenly. A flat-bottomed measuring cup or glass works wonders for creating a compact, level base that bakes evenly. Set aside while we whip up the filling, because this crust deserves a moment to shine before we cover it with creamy deliciousness.
3. Whip Up the Dreamy Protein Feta Filling
Here’s where the magic truly begins! In the bowl of your stand mixer (or a large mixing bowl if you’re using a hand mixer), combine the room-temperature cream cheese with the blended cottage cheese. Beat on medium speed for 2–3 minutes until silky smooth. Scrape down the sides and bottom of the bowl to ensure every bit of cheese is incorporated.
Next, crumble in your feta cheese and mix gently—this adds that signature tang without overpowering the dessert. Sprinkle in the sugar and beat for another minute until fully combined.
With the mixer on low speed, add the eggs one at a time, mixing just until each yolk disappears into the batter. Over-mixing here can incorporate too much air, causing cracks or puffiness, so patience is key. Finally, mix in the vanilla extract, just until combined. The result? A creamy, protein-packed cheesecake filling that’s smooth, luscious, and ready for swirling with berries.
4. Craft the Vibrant Berry Swirl Sauce
While the filling rests (because even desserts need a little chill time), let’s make the show-stopping berry tornado swirl. In a small saucepan, combine your berries, sugar, and lemon juice. Cook over medium heat for 5–8 minutes, stirring occasionally. The berries will soften, release their juices, and begin to bubble and thicken slightly.
Use a fork or potato masher to gently crush the berries to your desired consistency. Some chunks are totally fine—they add texture and make each bite a little berry adventure. If you prefer a smooth sauce, strain it through a fine mesh sieve. Let the sauce cool for a few minutes before swirling it into the cheesecake—it should be thick, pourable, and ready to create magic.
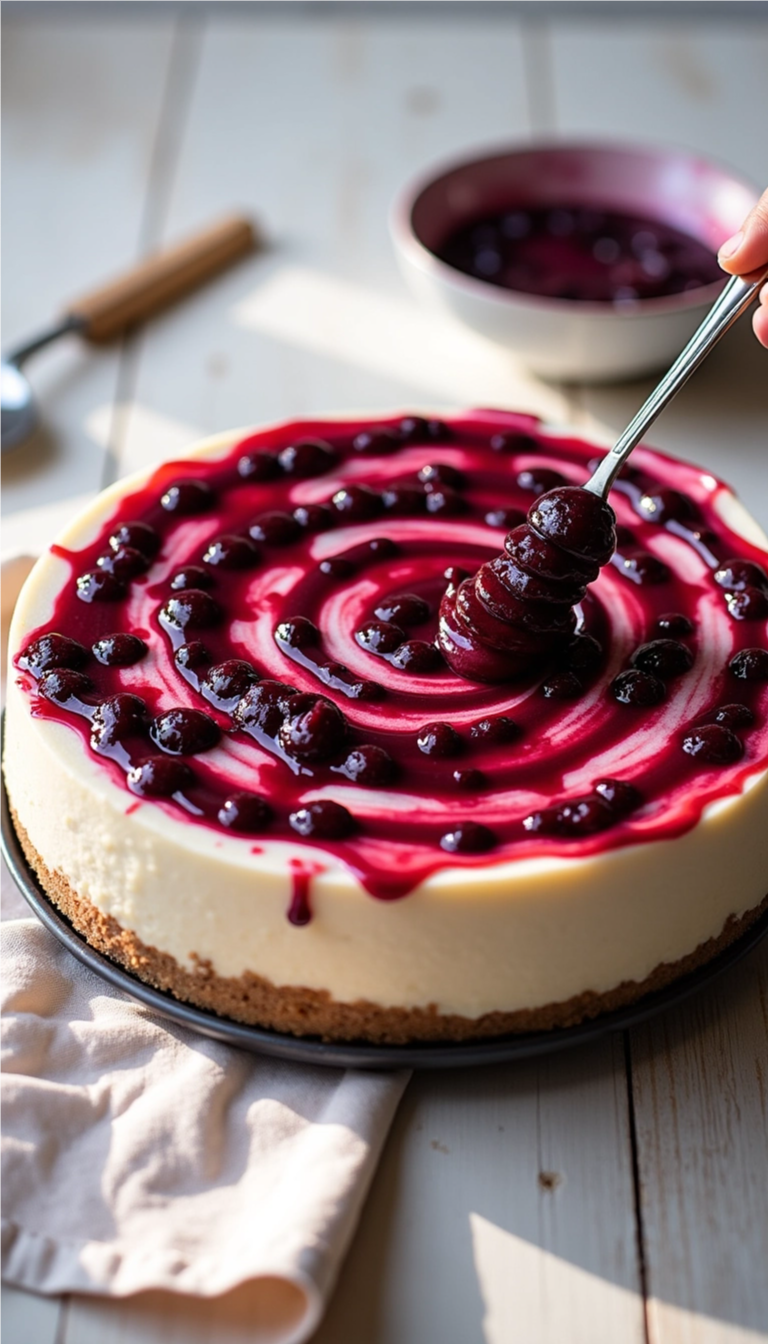
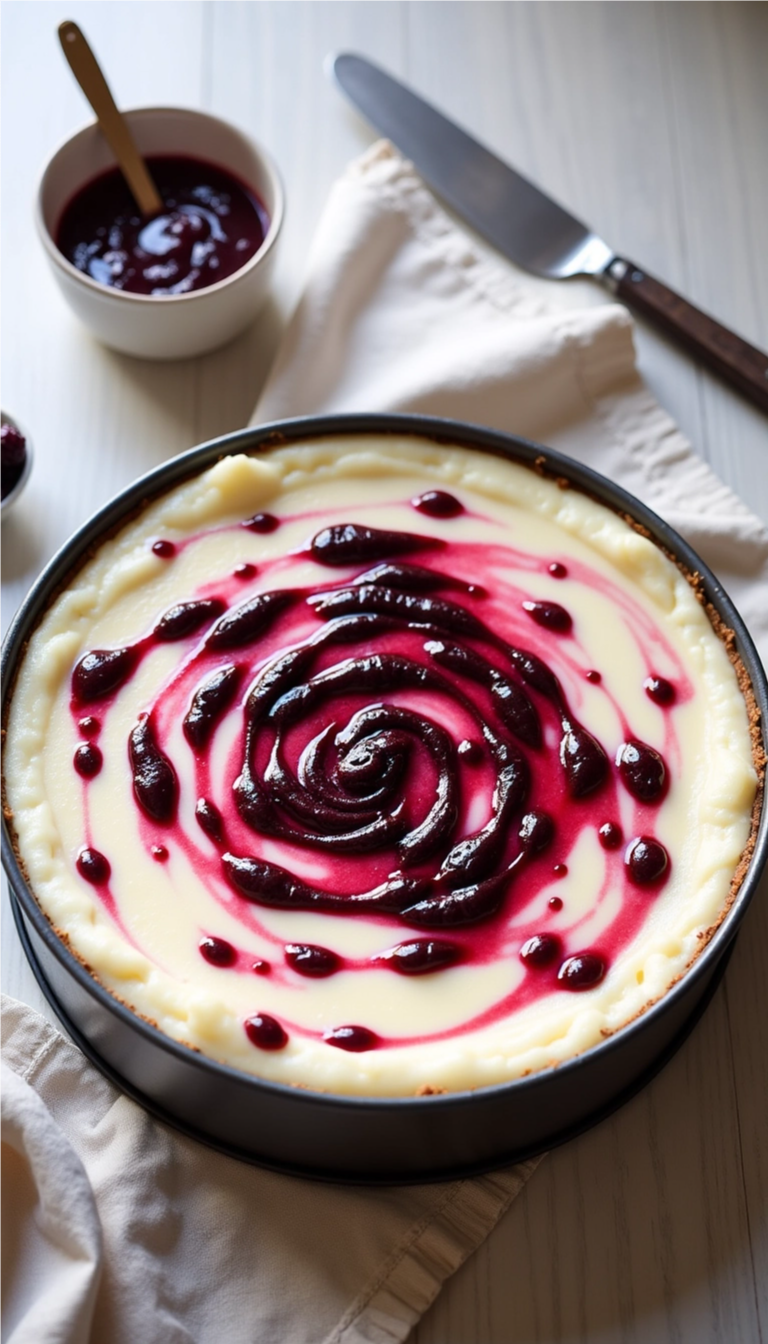
5. Assemble the Famous Tornado
Now comes the fun part! Pour your creamy, protein-packed cheesecake filling evenly over the prepared crust. Smooth it gently with a spatula to create an even canvas for your berry artistry.
Take your slightly cooled berry sauce and dollop spoonfuls randomly across the cheesecake. About 5–7 dollops work beautifully. Now grab a toothpick or thin skewer. Starting from the center of one dollop, gently drag the skewer through the filling and berry sauce, swirling to connect the dollops in a loose, circular, tornado-like pattern. Let your creativity shine—every swirl is unique, and that’s part of the charm. Be careful not to over-swirl, or the colors may blend into a uniform pink.
6. Bake to Perfection and Cool Slowly
Carefully place your masterpiece in the preheated oven. Bake for 50–60 minutes. The edges should look set and may pull slightly away from the pan, while the center will have a subtle jiggle—like a soft, cozy Jell-O. This gentle jiggle is your cue for a creamy, not overbaked, cheesecake.
Pro Tip: Resist the urge to open the oven door during the first 45 minutes; sudden temperature changes can cause cracking. Once baked, turn off the oven, crack the door slightly (a wooden spoon works perfectly for this), and let the cheesecake cool inside for 1 hour. This gradual cooling is the secret to a crack-free top and silky texture. Afterward, chill in the fridge for at least 4 hours or overnight for optimal flavor and texture.
Prep Time: 25 minutes
Cooking Time: 60 minutes (plus 1 hour cool-down in oven)
Total Time: 2 hours 25 minutes
Nutritional Facts
(Per serving, based on 12 servings)
-
-
Calories: ~290
-
Protein: ~12g ✅ (hello, protein boost!)
-
Carbohydrates: 22g
-
Fat: 18g
-
Fiber: 1g
-
Sugar: 16g
-
Sodium: 380mg
Dietary Tags:
This dessert is vegetarian. For a gluten-free version, use certified gluten-free graham crackers. Thanks to the cottage cheese + feta combo, you’re getting a nice boost of protein and calcium, while the berries bring in antioxidants and vibrant color. Perfectly indulgent, perfectly nourishing, and totally TikTok-ready! 🍓✨ -
Storage and Reheating Tips
Store any leftovers (if you have any!) covered tightly with plastic wrap or in an airtight container in the refrigerator. It will stay fresh and delicious for up to 5 days. For longer storage, you can freeze the cheesecake. Wrap the entire cooled cheesecake (or individual slices) securely in plastic wrap and then a layer of aluminum foil. It can be frozen for up to 1 month. To serve, thaw it overnight in the refrigerator. This cheesecake is best served chilled, straight from the fridge. There is no need to reheat it, as the cool, creamy texture is part of its charm!
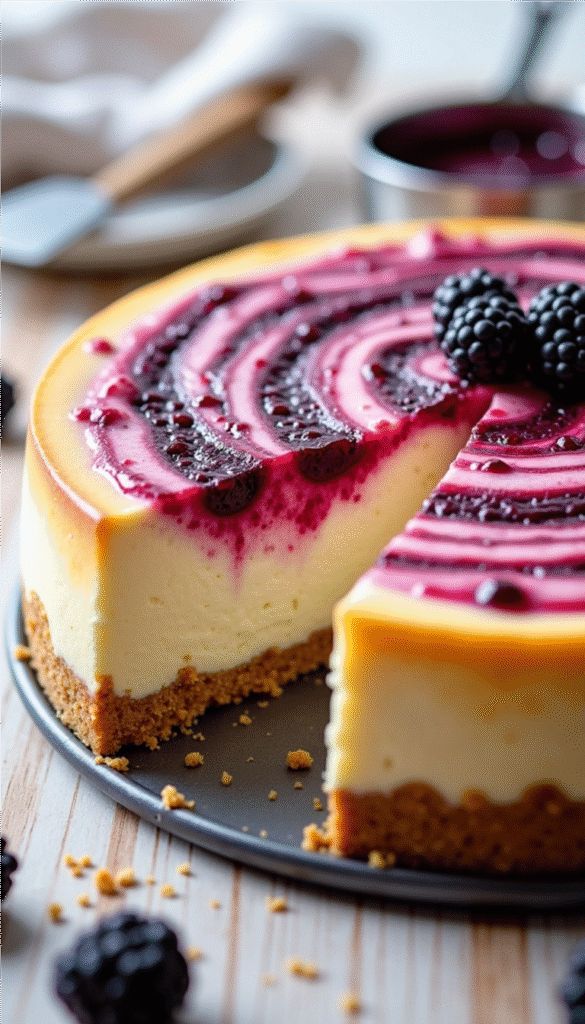
Serving Suggestions
Serve this stunning Viral TikTok Baked Feta Berry Cheesecake Tornado chilled, allowing the flavors to fully set and meld together. For an extra touch of elegance, dust the top with a light snowfall of powdered sugar just before serving and garnish with a few fresh mint sprigs and a handful of extra berries on the side. It’s a complete showstopper all on its own, but for a truly decadent experience, pair each slice with a dollop of freshly whipped cream or a scoop of vanilla bean ice cream. Beverage-wise, it pairs beautifully with a hot cup of coffee, a glass of cold milk, or even a flute of sparkling Prosecco for a truly celebratory feel.
Reader Tips or Helpful Notes
-
Room Temperature is KEY: Ensure your cream cheese, eggs, and feta are truly at room temperature. This is the single most important tip for a smooth, lump-free, perfectly emulsified filling. Cold ingredients are the main cause of a grainy texture.
-
Don’t Over-mix the Eggs: Once you add the eggs, mix on low speed just until they are incorporated. Over-beating incorporates too much air and can lead to cracking.
-
The Jiggle Test is Your Best Friend: The center of the cheesecake should still have a slight jiggle when you take it out of the oven. It will continue to set as it cools. A fully firm center means it’s overbaked.
-
Patience with Cooling: The gradual cool-down in the turned-off oven is a non-negotiable step for preventing cracks due to sudden temperature changes.
-
Easy Crumb Crust: Using the bottom of a flat measuring cup or a glass to press the crust down ensures it’s compact and won’t crumble when sliced.
-
Customize Your Swirl: Get creative with the berry swirl! You can make hearts, zig-zags, or a classic marble pattern. Just use a light hand.
-
Feta Texture Matters: Crumble your feta well before adding it to the cream cheese to avoid any large, salty chunks in your final dessert.
-
Water Bath Alternative: If you’re prone to cracked cheesecakes, you can bake this in a water bath for ultimate creaminess, but the slow cool-down method usually suffices for this recipe.
-
Clean Slices: For picture-perfect slices, dip your knife in hot water and wipe it clean between each cut.
-
Berry Boost: For an even more intense berry flavor, add a teaspoon of lemon zest to the berry sauce as it cooks.
Recipe FAQs
Q: Can I use a different fruit for the tornado swirl?
A: Absolutely! This recipe is incredibly versatile. Mango, peach, cherry, or even a passion fruit puree would be stunning. Just adjust the sugar in the sauce depending on the sweetness of your chosen fruit.
Q: How long does it take for the cheesecake to cool completely before serving?
A: After its initial hour cooling in the turned-off oven, you should let it cool completely at room temperature for another hour or two. For the best texture and cleanest slices, I highly recommend refrigerating it for at least 4 hours, but ideally overnight, before serving.
Q: I’m not a fan of feta. What can I use as a substitute?
A: If you’re wary of the feta, you can replace it with an equal amount of additional cream cheese for a more traditional flavor. For a similar tangy profile without the feta, you could try using 200g of full-fat ricotta cheese, well-drained, though the texture will be slightly grainier.
Q: My berry sauce is very runny. What can I do?
A: If your berry sauce hasn’t thickened enough, you can mix a teaspoon of cornstarch with a tablespoon of cold water to create a slurry. Stir this into the simmering berry sauce and cook for an extra minute until it thickens. Let it cool slightly before swirling.
Q: Can I make this cheesecake ahead of time?
A: 100% yes! This is actually the perfect make-ahead dessert. Its flavor and texture are even better the next day after the ingredients have had time to fully meld in the fridge. Just add any fresh garnishes right before serving.
Q: Why did my cheesecake crack?
A: The most common culprits are over-mixing the batter (adding too much air), a sudden temperature change (opening the oven door too early or cooling too quickly), or over-baking. Following the slow cooling method is your best defense!
Conclusion
And there you have it, my fabulous friends! 💖 You are now fully equipped to create your very own internet sensation. This Viral TikTok Protein Baked Feta Berry Cheesecake Tornado is more than just a recipe—it’s a confidence-boosting, joy-spreading baking adventure that proves you can create breathtaking desserts right in your own kitchen. I am so incredibly excited for you to experience the magic of that first creamy, tangy, berry-filled bite and to see your beautiful swirling creation.
When you make it (because I know you will!), please, please share your masterpiece with me! Tag me on Pinterest @TheTrendyMenu and use the hashtag #ProteinCheesecakeTornado so I can see your gorgeous work and shower you with love. Leave a comment below telling me all about your baking experience—I read every single one! Now go forth, bake, swirl, and conquer. You’ve so got this! 💕
XOXO,
Vanessa
Printable Recipe Card
Want just the essential recipe details without scrolling through the article? Get our printable recipe card with just the ingredients and instructions.


Comments