
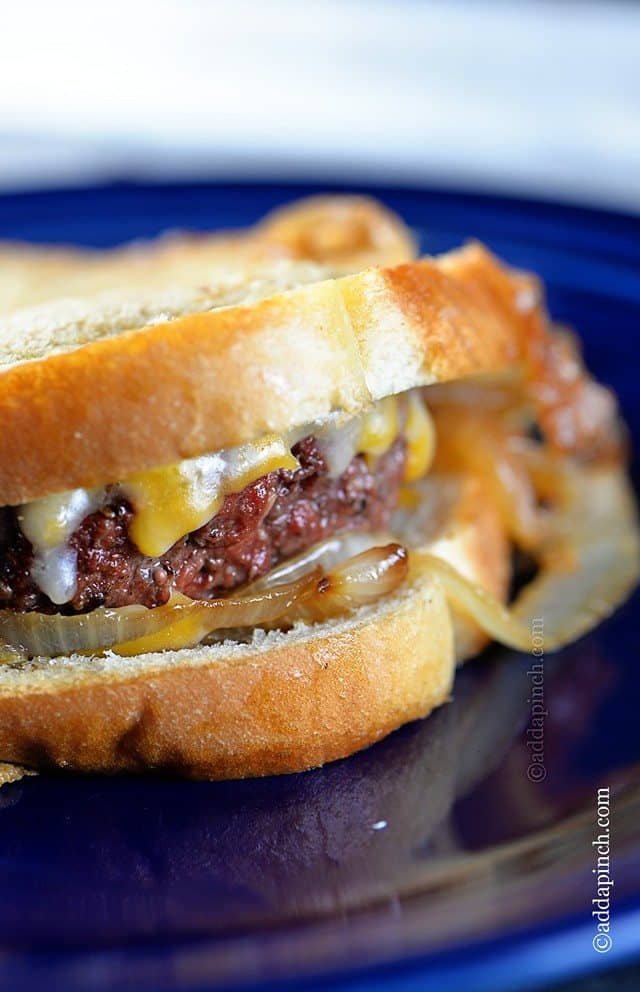
Get ready to sink your teeth into a classic American patty melt! This irresistible sandwich layers juicy beef patties with caramelized onions and melted cheese, all nestled between two slices of buttery, golden-brown bread. Whether it’s a cozy dinner or a casual weekend lunch, this recipe will whisk you away to diner nostalgia. Trust me, once you try making these at home, you’ll never look back!
Budget Information
This delightful patty melt recipe will run you about $10 total, which breaks down to roughly $2.50 per serving when making four mouthwatering sandwiches. Here’s how the budget looks:
– Ground Beef (1 lb): $5.00
– Bread (8 slices): $2.00
– Cheese (4 slices): $2.00
– Onions (1 large): $0.50
– Butter (for cooking): $0.50
– Worcestershire Sauce (1 tbsp): $0.10
– Seasoning: $0.10 (spices you likely have at home)
Why This Recipe Works
This patty melt isn’t just another sandwich; it’s a nostalgic trip wrapped in warm bread. The secret lies in the harmonious balance of flavors: the savory, seasoned beef, sweet caramelized onions, and gooey melted cheese all play together like a perfectly orchestrated symphony. Plus, the buttered toast adds a satisfying crunch that will make your taste buds sing! Easy to whip up and even easier to devour, this recipe will become a cherished favorite in your home just like it is in mine.
Ingredients + Optional Substitutions
Here’s what you need to create this masterpiece:
- 1 lb Ground Beef ($5.00) – for a leaner option, use ground turkey or chicken
- 8 slices Bread ($2.00) – rye or sourdough work fabulously if you want to switch it up!
- 4 slices Cheese ($2.00) – Swiss or cheddar are classic picks; feel free to use your favorite cheese
- 1 large Onion ($0.50) – sweet onions like Vidalia caramelize beautifully, but yellow onions are great too
- Butter (for cooking) ($0.50) – for a dairy-free option, use olive oil or vegan butter
- 1 tbsp Worcestershire Sauce ($0.10) – soy sauce can be a substitute for extra flavor
- Stone House Seasoning (or your preferred spices) ($0.10) – a mix of salt, pepper, and garlic powder will do the trick
Step-by-step Recipe Instructions
Step 1: Start by dividing the ground beef into four equal-sized patties. Make them slightly larger than your bread as they’ll shrink during cooking. Heat a 12-inch skillet over medium heat, allowing it to warm up for a couple of minutes. Once hot, add 1 tablespoon of butter, letting it melt and fill the pan with that beautiful aroma. Gently place two of the beef patties in the skillet, seasoning each with Stone House Seasoning and a splash of Worcestershire sauce. Cook these for about 5 minutes on each side until they’re beautifully browned and cooked through (about 10 minutes total). Remove the patties from the skillet and place them on a plate. Repeat with the remaining patties, but don’t worry about the clean-up just yet.
Step 2: Once all the patties are cooked, wipe your skillet clean with paper towels to remove any residue, keeping the flavor intact. Now, spread softened butter over one side of each slice of bread, creating that irresistible golden-brown crust we all crave. Place two slices of bread butter-side down in the skillet. Carefully top each slice with some caramelized onions (oh, the sweet aroma!), a patty, and a slice of your favorite cheese. Now, for that perfect sandwich experience, add another slice of bread on top and spread softened butter over the top side. Cooking two sandwiches at a time, toast until one side reaches a beautiful golden brown—around 2 minutes. If needed, cover the skillet with a lid during cooking to help the cheese melt quicker, because who doesn’t want gooey cheese?
Step 3: Once everything is golden and melty, it’s time to remove these beauties from the skillet immediately to prevent further cooking. Serve them hot, perhaps with a side of chips or a simple salad for a delightful contrast. Get ready for a flavor explosion that is sure to take you back!
Nutritional Facts
Calories: 712 kcal
Protein: 47 g
Carbohydrates: 26 g
Total Fats: 46 g
Saturated Fat: 20 g
Fiber: 1 g
Sugar: 3 g
Sodium: 1020 mg
Storage and Reheating Tips
If you have any leftovers—though I doubt it!—allow them to cool completely before storing them in an airtight container. Refrigerate for up to 3 days. For reheating, pop them in the skillet over medium heat for a few minutes on each side until they’re warmed through and the bread gets that glorious crunch back. You could also use a microwave, but you’ll lose that heavenly crispy exterior. Just remember, the magic is in the crunch!
Serving Suggestions
For a truly classic experience, serve your patty melts with a side of crispy French fries or a fresh coleslaw. You could also whip up a simple vegetable soup for some warmth and comfort on a chilly day. And don’t forget a delicious pickle or two on the side to add that extra zing!
Reader Tips or Helpful Notes
Feel free to customize your patty melt! Add some sautéed mushrooms for an earthier flavor, or try a spicy pepper jack cheese for a bit of a kick. If you’re feeling adventurous, toss in some fresh spinach or avocado slices for added texture and flavor. Just remember to keep an eye on your cooking times, especially if you’re adding extra ingredients. Cooking is about experimentation, so dive in and make it your own!
Recipe FAQs
Can I use ground turkey instead of beef?
Absolutely! Ground turkey is a leaner alternative, but it might need a bit more seasoning to keep it flavorful.
What kind of cheese is best for patty melts?
Swiss cheese is the classic choice, but feel free to use cheddar, American, or even pepper jack if you want a spicy twist!
Can I make this vegetarian?
Yes! Try using a meat substitute or a hearty veggie burger patty with the same toppings to keep the essence of a patty melt.
How do I caramelize onions?
Slice your onions and cook them low and slow in a bit of butter or oil until they’re golden brown and sweet. It takes about 15-20 minutes, so patience is key!
Can I freeze leftover patty melts?
Yes, you can! Wrap them tightly in plastic wrap or foil and store them in an airtight container. Just remember to reheat thoroughly before serving!
