
If you’re looking for a delightful and easy way to elevate your brunch or snack game, this Cured Salmon recipe is just what you need! Transform fresh salmon into a savory, flavor-packed centerpiece with a simple curing process that requires minimal ingredients and patience. Perfect on bagels, omelets, or solo, this homemade delicacy will not only please your palate but also save you money compared to store-bought versions!
Budget Information
The total cost for this Cured Salmon recipe comes in at approximately $12, making it $3 per serving. The main expense is the salmon fillet, which can be found at around $7 per pound, with the remaining ingredients costing about $5 altogether (salt, sugar, dill, and any seasoning). With this budget-friendly yet gourmet option, impress your friends and family without breaking the bank!
Why This Recipe Works
This recipe is a fantastic blend of simplicity and sophistication, showcasing how a few basic ingredients can yield explosive flavors. By curing the salmon instead of cooking it, you preserve its natural texture and moisture while infusing it with savory goodness. Plus, this method allows you to customize the flavor profile—whether you prefer dill, citrus, or even aromatic spices—providing a versatile dish that shines in any scenario, from breakfast to dinner parties!
Ingredients + Optional Substitutions
Here’s what you’ll need for your Cured Salmon, along with their approximate costs:
- 1 lb fresh salmon fillet – $7
- ½ cup kosher salt – $1
- ½ cup granulated sugar – $0.50
- 2 tablespoons fresh dill (or your choice of herb) – $1.50
- 1 teaspoon black pepper – $0.50
- Plastic wrap (for curing) – negligible cost
For your own spin, feel free to swap out the dill for other herbs like thyme or parsley, or add in zesty lemon or lime zest for a citrusy twist!
Step-by-step Recipe Instructions
Step 1: Start by rinsing your salmon fillet under cold running water, letting it soak up just enough of that refreshing chill. Using a paper towel, gently pat the fish dry to remove excess moisture, then slice it in half widthwise—just like a hamburger bun cut open!
Step 2: In a small bowl, mix together the kosher salt, granulated sugar, chopped dill, and black pepper until well combined. This mixture is your flavor powerhouse! Next, generously press this rub into the exposed flesh of both halves of salmon, ensuring that every nook and cranny is covered. Don’t worry about the skin; it’s going to help keep everything moist and delicious!
Step 3: Sandwich the salmon halves back together, skin-side out, to protect that tasty meat you just seasoned. Wrap the whole thing tightly in plastic wrap, making sure no air pockets are left hanging around. Now, find a high-sided baking dish to place the salmon in, and stack another similar-sized dish on top. Weigh it down with some cans or jars, and slide this monumental feat into the fridge. Here’s where the magic happens—every day, you’ll flip the salmon over to ensure even curing for about four days!
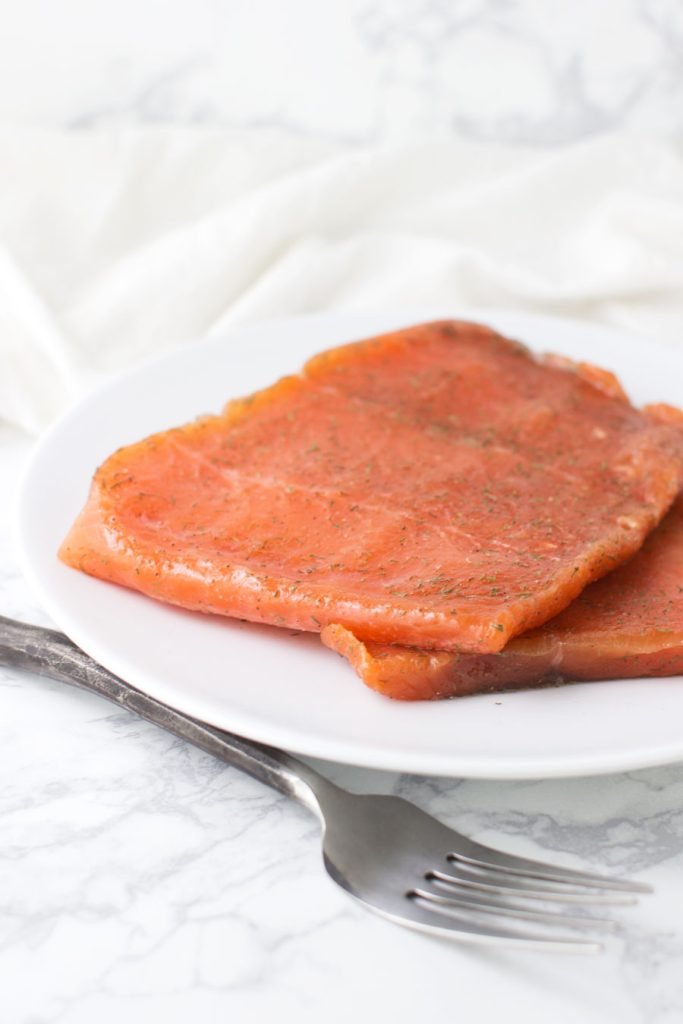
Step 4: After four days of patience, it’s time to reveal your masterpiece! Carefully unwrap the salmon and rinse off the curing mixture under cold water. Pat it dry using a clean paper towel. Voilà! You’ve got freshly cured salmon ready to slice and serve. Enjoy it within the next three days for optimum freshness, or keep it covered in the fridge!
Nutritional Facts
Per serving (approx. 4 oz):
- Calories: 164
- Protein: 25g
- Carbohydrates: 4g
- Total Fats: 7g
- Saturated Fat: 1g
- Fiber: 0g
- Sugar: 3g
- Sodium: 52mg
Storage and Reheating Tips
Your homemade cured salmon can be stored in an airtight container in the refrigerator for up to 3 days after you’ve rinsed it off. If you’re not planning to eat it within that time frame, consider freezing it! Just slice it into portions, wrap it tightly, and pop it in the freezer where it can last for a couple of months. When you’re ready to indulge again, simply thaw it in the fridge overnight. There’s no need to cook it, as that fresh flavor will remain intact!
Serving Suggestions
Cured salmon is incredibly versatile and can be served in so many delightful ways! Try it on toasted bagels slathered with cream cheese, accompanied by capers and thinly sliced red onion. For something lighter, toss it in a fresh salad with greens, cherry tomatoes, and a squeeze of lemon. You can even use it in an impressive omelet or frittata for brunch. No matter how you enjoy it, this cured salmon will add a touch of gourmet flair to your meal.
Reader Tips or Helpful Notes
When selecting your salmon, opt for sashimi-grade fish from a reputable source to guarantee freshness and quality. If you want to take this recipe to the next level, consider experimenting with additional flavors like honey, citrus zest, or unique spices in your curing mixture. And remember, patience is key! The longer it cures, the richer the flavors will develop. So, make sure to set a reminder to flip your salmon each day—trust me, it’s worth the wait!
Recipe FAQs
Can I use frozen salmon for curing?
Yes, just make sure to thaw it properly in the fridge before starting the curing process. Always choose quality fish for the best results!
How long does the curing process take?
This recipe takes about 4 days, but it’s a hands-off process once you have everything wrapped and in the fridge.
Can I add other spices or herbs?
Absolutely! Get creative with your seasonings. Try adding some crushed red pepper for heat or zest from citrus fruits for brightness!
How should I serve cured salmon?
The possibilities are endless! From breakfast bagels to salads and dips, it adds a gourmet touch to any dish!
How do I know when my salmon is ready?
After rinsing, it should have a firmer texture and a developed flavor. If it tastes good to you, it’s ready to enjoy!
