
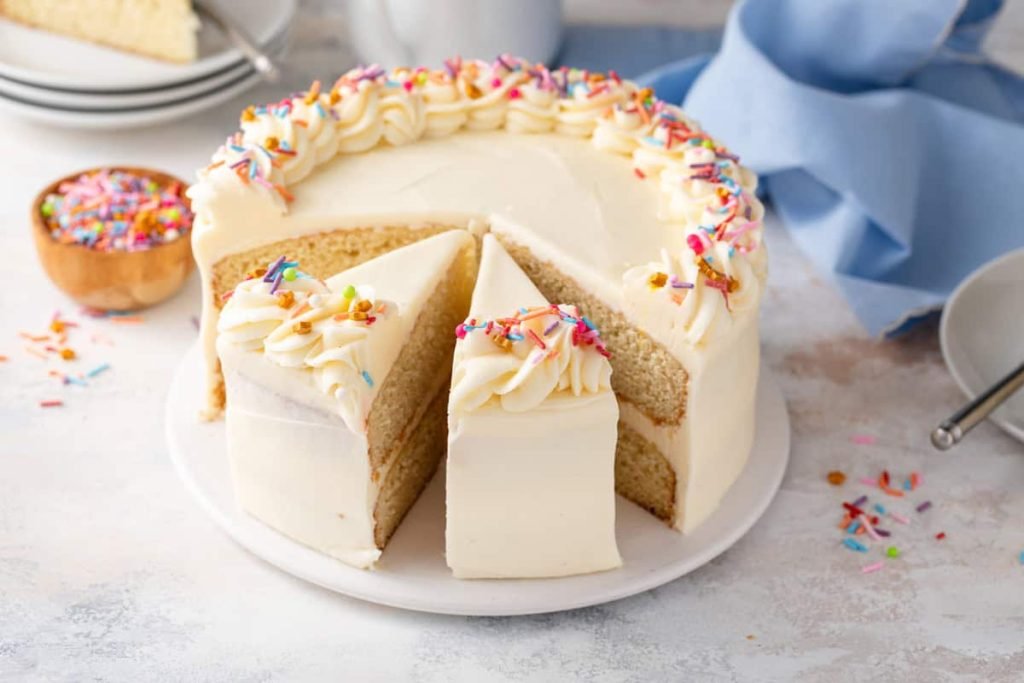
Indulge yourself in the delightful layers of this classic vanilla cake, boasting a light, fluffy texture enriched with creamy buttermilk and a twirl of both vanilla extract and vanilla bean paste. Perfect for birthdays, celebrations, or even just an ordinary Wednesday, this cake is sure to steal the spotlight and leave your taste buds dancing with exuberance!
Budget Information
This scrumptious vanilla cake costs approximately $12.45 to make, which means you’ll get about 12 generous slices for only $1.04 each. A sweet deal for a cake that’s bound to impress!
Why This Recipe Works
This recipe shines because it balances deliciousness with simplicity. By using a combination of buttermilk for moisture and cake flour for a tender crumb, it creates a cake that’s not just easy to whip up, but one that will elevate any occasion. The layers are light, airy, and bursting with vanilla flavor, making it utterly irresistible – even for those who think they dislike vanilla! You’ll definitely want to bookmark this gem for future baking endeavors!
Ingredients + Optional Substitutions
To create this dreamy vanilla cake, you’ll need the following ingredients:
- 2 1/4 cups cake flour – $2.00
- 2 teaspoons baking powder – $0.10
- 1/2 teaspoon baking soda – $0.05
- 1/2 teaspoon kosher salt – $0.02
- 1 1/4 cups room-temperature buttermilk – $1.50
- 1 tablespoon vanilla bean paste – $1.50
- 2 teaspoons pure vanilla extract – $0.50
- 12 tablespoons room-temperature unsalted butter – $2.00
- 1 1/2 cups granulated sugar – $0.75
- 3 large room-temperature eggs – $1.50
Feel free to swap the buttermilk with plain yogurt for a similar effect, or use almond milk mixed with a splash of vinegar as a dairy-free alternative. However, for the richest flavor, I’d recommend sticking with the buttermilk!
Step-by-Step Recipe Instructions
Step 1: Preheat your oven to 350°F and place the rack in the center. Grab two 8-inch or 9-inch round cake pans, grease them thoroughly with butter or cooking spray, and line the bottoms with parchment paper. This will ensure that your layers come out smoothly without sticking!
Step 2: In a large mixing bowl, sift together the cake flour, baking powder, baking soda, and kosher salt. This step is crucial as it adds air to the dry ingredients, helping to create a fluffier cake.
Step 3: Using a stand mixer with the paddle attachment or a handheld mixer, cream together the room-temperature butter and sugar on medium speed for around 3 minutes, or until the mixture becomes light and fluffy. This process incorporates air into the batter and is a key factor in achieving that soft texture.
Step 4: Add the eggs one at a time, mixing well after each addition. Next, pour in the vanilla bean paste and extract. Don’t forget to scrape down the sides of the bowl to make sure you combine all those tasty bits!
Step 5: Now it’s time to bring the dry ingredients into the mix. Start by adding one-third of the flour mixture, then follow it with half of the buttermilk. Mix on low speed until just combined, and then continue this pattern – flour, buttermilk, flour, buttermilk, and finish off with the last of the dry ingredients. Mix just until combined for the best texture!
Step 6: Divide the batter evenly between your prepared cake pans, smoothing the tops with a spatula. Bake at 350°F for 25-35 minutes, or until a toothpick inserted into the centers comes out clean. Your kitchen will be filled with an enchanting aroma as your cake bakes!
Step 7: Allow the cakes to cool in the pans for 10-15 minutes, then gently turn them out onto a wire rack. Make sure to let the layers cool completely before frosting. Your patience will be rewarded! The feeling of anticipation as you await your masterpiece is a baker’s sweet burden!
Nutritional Facts
Serving Size: 1 unfrosted slice
Calories: 320 kcal
Protein: 5 g
Carbohydrates: 44 g
Total Fat: 14 g
Saturated Fat: 8 g
Fiber: 1 g
Sugar: 27 g
Sodium: 257 mg
Storage and Reheating Tips
Your beautifully baked and cooled vanilla cake layers can be wrapped in plastic wrap and stored at room temperature for 1-2 days. This is perfect if you’re planning to frost them just before serving. If you’ve adorned your cake with frosting, store it in an airtight container. Buttercream-frosted cakes can sit at room temperature for up to 3 days, but if you’ve used cream cheese frosting, stow it in the fridge for up to 3 days. And don’t forget about the freezer! Your unfrosted cake layers can be frozen for up to 2 months, while a frosted full cake or individual slices can be kept frozen for up to 1 month.
Serving Suggestions
This classic vanilla cake is wildly versatile in its pairing. Top it off with a velvety vanilla buttercream or turn it up a notch with chocolate ganache. Fresh berries, whipped cream, or even a drizzle of caramel sauce can make this dessert shine. For those who adore contrasts, serve it alongside a scoop of icy cold vanilla or berry ice cream for a heavenly treat that will have everyone coming back for seconds!
Reader Tips or Helpful Notes
Be sure to measure your flour correctly! Spoon it into your measuring cup and level it off with a knife for accuracy. This helps prevent a dense cake. When it comes to whipping eggs, aim to use room-temperature eggs to enhance the batter’s texture and fluffiness. Lastly, don’t rush the cooling process – allowing the cakes to cool completely ensures that the frosting won’t melt off the sides, leading to a beautifully dressed cake that’s as stunning as it is delicious!
Recipe FAQs
Can I make this cake ahead of time?
Absolutely! You can bake the cake layers a day before and store them in an airtight container, allowing you extra time to frost and decorate when you’re ready.
Can I use this recipe for cupcakes?
Yes! This recipe can easily be repurposed for cupcakes. Just fill the cupcake liners about 2/3 full and bake for 18-20 minutes at 350°F.
Can I substitute the cake flour for all-purpose flour?
While you can, the texture will be less tender. If you must use all-purpose flour, you can mix it with cornstarch to achieve a lighter end result.
What’s the difference between baking powder and baking soda?
Baking powder contains both an acid and a base and works well in recipes that don’t contain acid, while baking soda needs an acidic ingredient (like buttermilk) in the recipe to activate it.
Can this cake be frozen after baking?
Yes! You can freeze the unfrosted cake layers for up to two months. Just wrap them tightly in plastic wrap. When you’re ready to use them, let them thaw in the fridge overnight.
