
Delve into the world of crunchy, wholesome delight with our Homemade Almond Granola recipe! Perfectly roasted oats blended with almonds, cinnamon, and sweetened to perfection, this granola not only tantalizes your taste buds but also serves as an amazing gift idea during the holiday season. Get ready to enjoy healthy breakfasts, snacks, and delightful toppings for your favorite desserts!
Budget Information
The total cost of this recipe is approximately $8.50, which breaks down to about $1.06 per serving (8 servings). Here’s the cost of each ingredient:
– Old-fashioned rolled oats: $2.00
– Sliced almonds: $3.00
– Rice Krispies: $1.00
– Cinnamon: $0.50
– Honey: $1.50
– Butter: $0.75
– Brown sugar: $0.25
– Dried fruits: $1.50
Why This Recipe Works
This recipe has become a cherished tradition in many homes, and for good reason! The combination of old-fashioned rolled oats and crunchy sliced almonds creates an irresistible texture. With just the right amount of sweetness from honey and brown sugar, this granola is the perfect balance of flavor, making it a crowd-pleaser. Plus, it’s incredibly versatile! You can customize it with your favorite nuts and dried fruits; why not experiment and make it your own? Grab a bowl, and let’s get started!
Ingredients + Optional Substitutions
Here’s what you will need to whip up your homemade almond granola:
– Old-fashioned rolled oats (about 3 cups, $2.00) – These are key for that chewy texture. Feel free to swap with quick oats, but keep in mind the texture will be different.
– Sliced almonds (1 cup, $3.00) – Use blanched or regular sliced almonds. You can also throw in some walnuts or pecans if you feel adventurous!
– Rice Krispies (1 cup, $1.00) – A sneaky way to add crunch! Experience a lovely balance between crispiness and chewiness.
– Cinnamon (1 tsp, $0.50) – This warm spice is essential for that cozy flavor.
– Honey (1/2 cup, $1.50) – The sweet glue that makes everything stick! Swap it with maple syrup if you’re leaning towards vegan.
– Butter (1/4 cup, $0.75) – Adds richness, but you can use coconut oil for a dairy-free version.
– Brown sugar (1/4 cup, $0.25) – Provides sweetness and that delightful caramelized flavor. Adjust if needed!
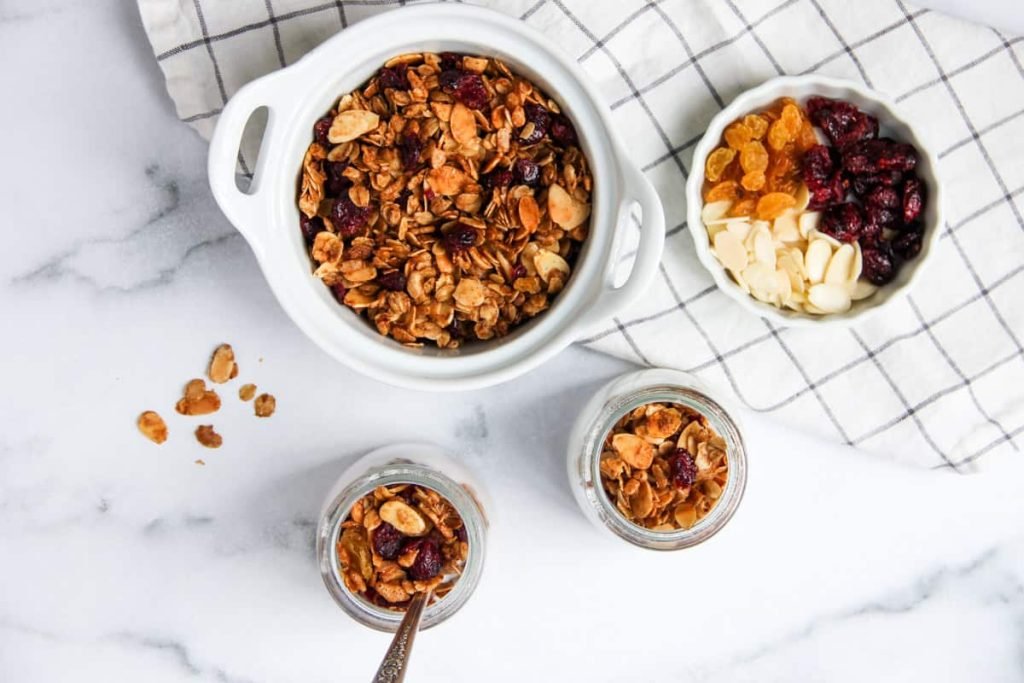
– Dried fruits (1 cup, $1.50) – Mix it up with cranberries, raisins, or even some chopped dried apples for extra flavor!
Step-by-Step Recipe Instructions
Step 1: First things first, gather all your ingredients and get your oven ready! Preheat your oven to 350°F (175°C). You want to make sure it’s nice and toasty before your granola goes in.
Step 2: Next, in a large mixing bowl, combine 1/2 cup of honey, 1/4 cup of butter, and 1/4 cup of brown sugar. Microwave this mixture for about 30-60 seconds until the butter melts. Stir until everything is perfectly combined and velvety smooth. Trust me, this is where the magic starts!
Step 3: In another large bowl, whisk together the dry ingredients. That’s 3 cups of old-fashioned rolled oats, 1 cup of sliced almonds, 1 cup of Rice Krispies, and 1 tsp of cinnamon. Mixing this will give you a delightful crunch factor!
Step 4: Now, pour your melted honey-butter-sugar concoction over the dry mix. Fold everything together gently but thoroughly until each oat and almond piece is beautifully coated.
Step 5: Line a large baking sheet with parchment paper and spread the granola mixture evenly. Make sure it’s not piled too high—think of it like a cozy blanket of goodness that needs room to toast.
Step 6: Bake in your preheated oven for about 20-25 minutes, stirring halfway through to ensure even toasting. The sweet aroma wafting through your kitchen will be hard to resist! Keep a close eye, so it doesn’t burn. You want it golden, not charred!
Step 7: Once your granola is beautifully toasted, take it out and let it cool completely on the baking sheet. It will crisp up even more as it cools!
Step 8: Last but not least, once cool, stir in about 1 cup of your favorite dried fruits. This is your moment to shine—personalize it just for you! Store your granola in an airtight container or gift it in jars to share the love!
Nutritional Facts
Per serving (1/2 cup):
– Calories: 222
– Protein: 5g
– Carbohydrates: 22g
– Total Fat: 14g
– Saturated Fat: 4g
– Fiber: 3g
– Sugar: 12g
– Sodium: 10mg
Storage and Reheating Tips
Your delicious homemade almond granola can be stored in an airtight container at room temperature for up to two weeks. If you want to extend its shelf life, feel free to pop it in the freezer! Just be sure to let it sit at room temperature for a few minutes to regain some crunch before serving.
Serving Suggestions
Enjoy your granola as part of a delicious breakfast bowl! Top Greek yogurt or your preferred dairy-free yogurt with a generous sprinkle of granola, drizzle with honey, and add berries or sliced bananas for a wholesome treat. Alternatively, dive into a bowl of your favorite cereal or keep it classic with milk. And when you’re really feeling fancy, add a scoop to your homemade ice cream for a delightful crunch!
Reader Tips or Helpful Notes
When making this granola, feel free to get creative! Swap the dried fruits for fresh ones, or add in seeds like chia or flaxseed for extra nutrition. Don’t forget to line your baking sheet for easy cleanup and an even bake. If you like your granola clumpy, just press it down after stirring and bake it a little longer. Enjoy the process and make it uniquely yours!
Recipe FAQs
Can I make this vegan?
Absolutely! Substitute the butter with coconut oil, and the honey with maple syrup for a completely vegan version.
How do I make this granola gluten-free?
Use certified gluten-free oats and ensure that your other ingredients, like the rice cereal, are also gluten-free.
Can I add chocolate?
Yes, chocolate chips make a delicious addition! Stir them in once the granola has cooled to prevent melting.
How can I adjust the sweetness?
Feel free to modify the amount of honey and brown sugar according to your taste—less sugar makes for a less sweet granola!
What should I do if my granola is too chewy?
If your granola doesn’t crisp up as much as you’d like, simply return it to the oven and toast for a few more minutes, stirring occasionally. Keep an eye on it to avoid burning!
