Table of Contents
Introduction
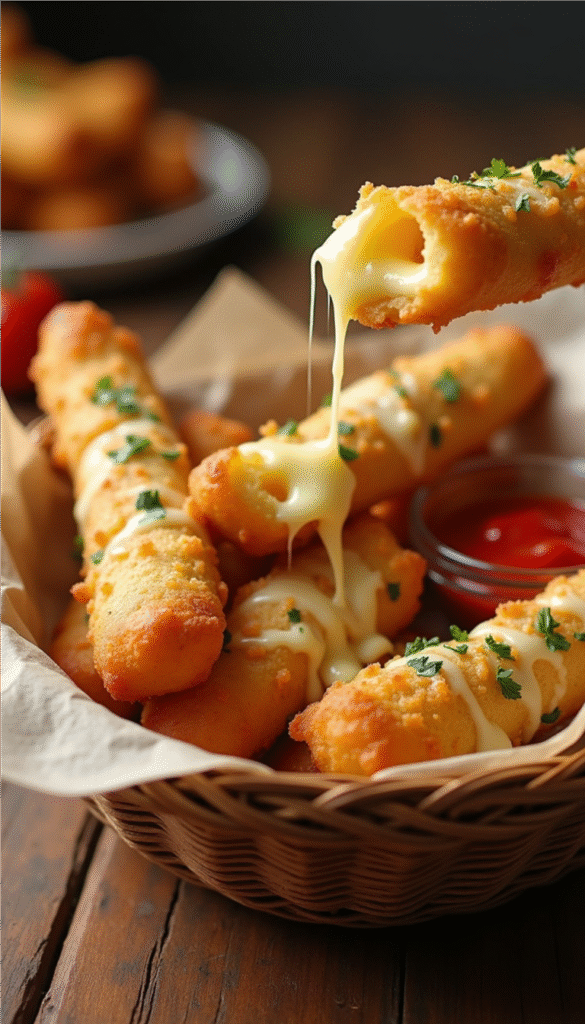
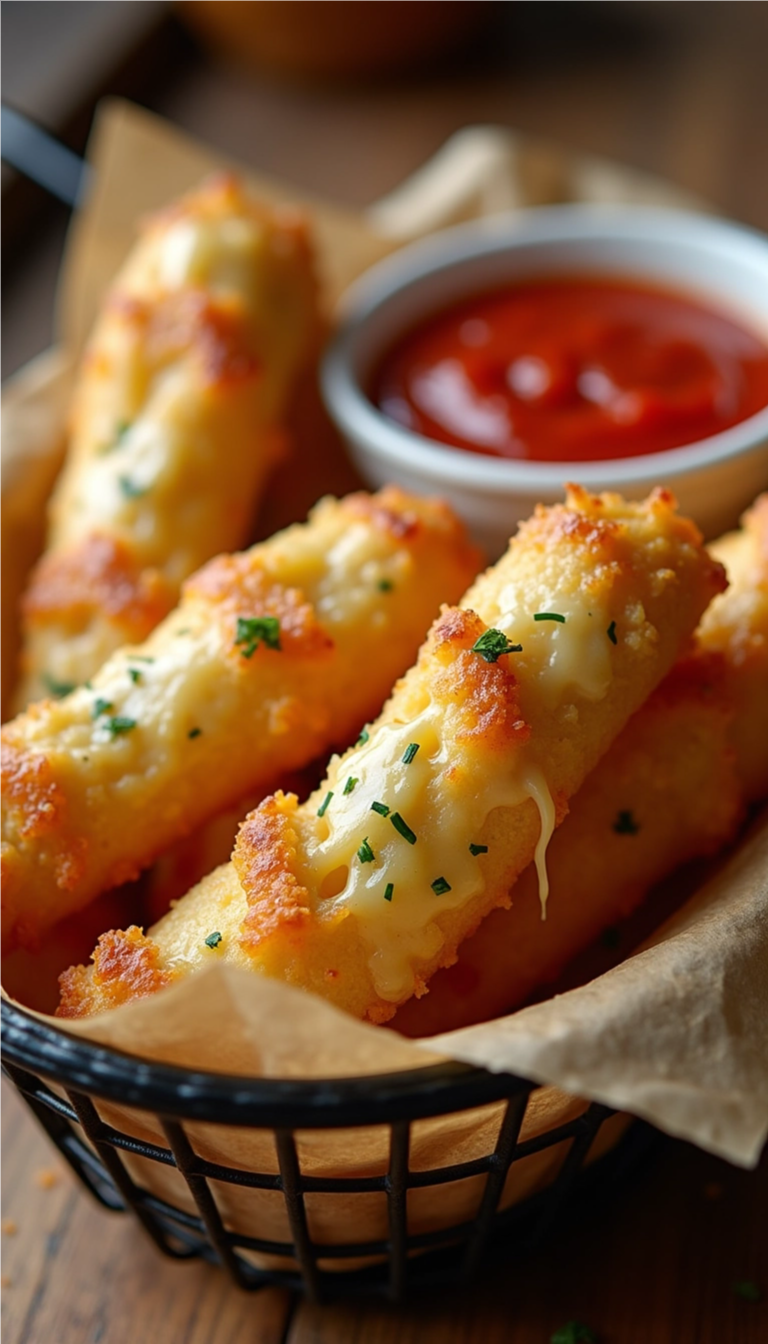
Aren’t garlic breadsticks the ultimate comfort food? Whether you’re binge-watching your favorite show or hosting an epic girls’ night, these Easy Air Fryer Cheesy Garlic Breadsticks will totally save the day. Picture this – golden, crispy on the outside, cheesy and gooey on the inside, with that tantalizing smell of garlic filling the room. I mean, what’s not to love? 💖
Traditionally served as an appetizer, these breadsticks are popular in Italian cuisine, but who says you can’t enjoy them as a side dish or snack any day of the week? Let’s be real: they’re good enough to be the star of your meal! I mean, do you really need a special occasion to indulge in warm, cheesy goodness? You definitely don’t! They’re perfect for cozy family dinners, movie marathons, or even a casual date night.
These breadsticks are not just about taste; they’re about creating a delightful and effortless experience. If you’re anything like me, you love easy recipes that give you major comfort food vibes but don’t require a culinary degree. This Easy Air Fryer Cheesy Garlic Breadsticks recipe brings together simplicity and flavor, making it a go-to for food lovers of all kinds, especially us fabulous Gen-Z foodies who want quick, trendy, and share-worthy options! Let’s dive into this crowd-pleasing delight that’s bound to make your next home-cooked meal oh-so-special! 🌟
Why You’ll Love This Recipe
These Easy Air Fryer Cheesy Garlic Breadsticks will steal your heart (and taste buds) for a multitude of reasons! First off, they’re ridiculously simple – requiring minimal ingredients and even less prep time. Just pop them in the air fryer, and voilà! You’ll be savoring warm, cheesy perfection in no time. Plus, air frying allows them to be super crispy without drowning them in oil, giving you that guilt-free indulgence we all crave.
They are also highly adaptable! Swap in your favorite cheeses, herbs, or add some spicy red pepper flakes for a kick. Versatility is the name of the game, and this recipe is easily customizable to suit everyone’s taste. Whether you’re serving picky eaters or food aficionados, these breadsticks are sure to please all palates!
Not to mention, they’re fantastic for family gatherings or game nights. Who wouldn’t grab a cheesy, warm breadstick Pass-the-dip, alongside a perfect pizza—because, duh, everyone loves bread. Whether you’re following a vegetarian diet or just looking to indulge, these cheesy delights fit seamlessly into any lifestyle. Let’s just say they’re a total win-win!
Budget Information
Keeping it cute and cost-effective is key, am I right? These Easy Air Fryer Cheesy Garlic Breadsticks are not only a crowd-pleaser but also super budget-friendly! Here’s a breakdown of costs per ingredient:
- Pizza dough (store-bought): $1.50
- Garlic (minced): $0.50
- Butter (melted): $0.25
- Mozzarella cheese (shredded): $2.00
- Parmesan cheese (grated): $1.50
- Dried oregano: $0.10
- Salt: $0.05
- Pepper: $0.05
Approximate total cost of ingredients: $6.95
With a total cost under $7, how fabulous is that? These cheesy breadsticks are perfect for a girls’ night in, family gatherings, or when you just want to treat yourself without breaking the bank! Plus, they’re all made from pantry staples, making them a safe bet even when your fridge is looking a little bare.
Why This Recipe Works
Okay, let’s get real about why this recipe is not just good, but great. The air fryer technology crisps up the outside without any excess grease, producing sizzling, mouthwatering results while inside, the cheese melts into a delectably gooey delight. Seriously, it’s the best of both worlds – crunchy on the outside, dreamy on the inside.
These Easy Air Fryer Cheesy Garlic Breadsticks can easily become a go-to recipe in your kitchen. They’re not just for special occasions; whip them up whenever you’re craving something cheesy and warm! Plus, who doesn’t love the aroma of garlic wafting through their home? It’s like a hug for your taste buds! This recipe is adaptable to fit a variety of dietary preferences; whether you need gluten-free options or extra protein, you can customize ingredients as needed.
Ingredients + Optional Substitutions
You Will Need:
- 1 pound pizza dough (store-bought or homemade): You can use gluten-free dough for a gluten-free option.
- 2 tablespoons garlic (minced): Fresh or jarred works great!
- 2 tablespoons butter (melted): Vegan butter can substitute if you’re avoiding dairy.
- 1 cup mozzarella cheese (shredded): Swap with cheddar for a stronger flavor.
- 1/2 cup parmesan cheese (grated): Nutritional yeast can be a great dairy-free substitute.
- 1 teaspoon dried oregano: Feel free to use Italian seasoning for a bolder taste!
- Salt and pepper to taste: Use sea salt for a gourmet touch or skip if you’re watching your sodium intake.
Optional Garnishes:
- Fresh parsley (chopped): For a pop of color and freshness.
- Red pepper flakes: For those who crave the spicy kick!
Equipment
You’ll need a few basic tools for this fabulous recipe:
- Air Fryer: The star of the show for these crispy breadsticks!
- Mixing Bowl: For mixing the garlic butter and combining ingredients.
- Pastry Brush: To easily spread the garlic butter on the dough.
- Baking Parchment Paper: Optional, for easy clean-up and to prevent sticking.
- Measuring cups and spoons: Essential for accurate ingredient quantities.
- Spatula or Knife: To slice the breadsticks post-cooking.

Step-by-Step Recipe Instructions
Yield: This recipe serves approximately 4-6 people.
Step 1: Start by grabbing your air fryer and preheating it to 350°F (175°C). This ensures that your breadsticks will cook evenly and crisp up beautifully. It typically takes about 5 minutes to preheat, so you can use this time to prepare your dough!
Step 2: Take your pizza dough and roll it out on a clean surface into a rectangle. Aim for about 1/2 inch thick to achieve that perfect breadstick texture. While doing this, consider sprinkling a little flour on the surface to prevent sticking. If you find it too sticky, you can also lightly flour your hands and the rolling pin.
Step 3: In a mixing bowl, combine the melted butter and minced garlic. Stir well until they are fully blended. You want to create that fragrant mixture that will coat the breadsticks and make your entire kitchen smell heavenly. Optional: If you’re adding oregano or any other spices, mix those in at this stage.
Step 4: Use a pastry brush to evenly apply the garlic butter mixture all over the top of the rolled-out dough. Don’t be shy! You want it to be well-coated, as this will infuse lovely garlic flavor into every bite.
Step 5: Sprinkle the shredded mozzarella cheese all over half of the dough. If you’re feeling extra adventurous, don’t hesitate to add a layer of parmesan cheese too! Once your cheesy layer is evenly distributed, fold the dough in half over itself, pressing the edges gently to seal it.
Step 6: Now for the fun part! Cut the folded cheese-filled dough into 1-inch wide strips using a knife or pizza cutter. You can make them longer or shorter, depending on your mood! Just keep in mind that thinner breadsticks will cook faster.
Step 7: Place the dough strips into your preheated air fryer basket. Make sure they’re spaced out a little; you want each stick to have room to breathe and crisp up. Depending on the size of your air fryer, you may need to do this in batches!
Step 8: Air fry for about 7-10 minutes or until they become golden brown and oozing with melted cheese. You can check on them halfway through and give the basket a little shake to ensure even cooking. When they look perfectly crispy and smell divine, they’re ready to go!
Step 9: Carefully remove the breadsticks from the air fryer and let them cool for a few minutes. This is where the aroma will have all your friends gathering in the kitchen!
Step 10: Finally, garnish your cheesy garlic breadsticks with a sprinkle of chopped fresh parsley and maybe a light drizzle of olive oil if you’re feeling fancy. Serve warm with a side of marinara or ranch dressing for dipping!
Prep Time: 10 minutes
Cooking Time: 10 minutes
Total Time: 20 minutes
Nutritional Facts
Approximate nutrition per serving (1 serving = 2 breadsticks):
- Calories: 260
- Protein: 12g
- Carbohydrates: 30g
- Fat: 12g
- Fiber: 1g
- Sugar: 1g
- Sodium: 600mg
Dietary Tags: Vegetarian, Kid-Friendly, Can be gluten-free with dough alternative
Storage and Reheating Tips
Let’s chat about how to keep those cheesy breadsticks fresh so you can enjoy them later! Here’s what you need to know:
- Refrigeration: Store leftover breadsticks in an airtight container in the fridge for up to 3 days. Make sure they cool completely before sealing to prevent condensation.
- Freezing: These delicious bites can also be frozen for up to 2 months! Lay them out on a baking sheet first until frozen solid, then transfer to a freezer-safe bag or container. This way, they don’t stick together.
- Best Containers: Use a glass or plastic airtight container for fridge storage, and a vacuum-sealed bag for the freezer.
Reheating Methods:
- Microwave: Pop a couple in for about 20-30 seconds for a quick reheat. But be careful, as it may make them a little chewy rather than crispy!
- Oven: Preheat your oven to 350°F (175°C) and bake for about 5-7 minutes to regain that crispy texture.
- Air Fryer: For best results, reheat them in the air fryer for about 3-5 minutes at the same temperature.
- Skillet: You can also reheat them on a skillet with a little butter for extra flavor and crispiness.
Shelf Life:
- Keep in mind that stored leftovers can lose a bit of their crunch and flavor over time, so it’s best to enjoy them fresh when possible!
Serving Suggestions
When it comes to serving these Easy Air Fryer Cheesy Garlic Breadsticks, it’s all about making them feel special! You can serve them hot, straight from the air fryer, for the ultimate melt-in-your-mouth experience. Pair these beauties with a side of marinara sauce for dipping, or go wild with creamy ranch dressing or a zesty garlic aioli.
If you’re feeling festive, try serving them alongside a light salad or pasta dish. They’re also perfect for a cozy movie night when paired with your favorite take-out pizza! And for bonus points, why not whip up a charcuterie board? Stack them next to slices of salami, olives, and some artisanal cheeses for a chic and share-worthy spread.
Reader Tips or Helpful Notes
Here are some reader-inspired tips that will elevate your Easy Air Fryer Cheesy Garlic Breadsticks game!
- Use fresh herbs! Adding fresh basil or oregano to the garlic butter mixture ramps up the flavor by a mile!
- Try different toppings: Spice things up with a sprinkle of everything bagel seasoning or garlic powder to enhance that garlic flavor.
- Shortcuts: Roll out pre-made dough in advance and store it in the fridge for quick access when the cravings hit.
- Don’t overcrowd the air fryer basket – it’s all about that crispy finish! Cook in batches if necessary.
- Pasta for one? These breadsticks are a great side to any deep-dish pizza. Get creative with flavors!
- Make them cheesy! Add more than one type of cheese for a flavor explosion. Think pepper jack for some extra heat!
- Cool and Crisp: Letting them cool slightly after cooking will help preserve that crunchy texture.
- Check the dough: If your dough feels too sticky, it might need a bit more flour while rolling out.
- Get the family involved! Let the kids help cut the dough – it’s a fun way to bond in the kitchen!
- Watch that cook time! Ovens can vary; keep a close eye the first time you make them to ensure they’re just right!
Recipe FAQs
1. Can I use homemade pizza dough?
Absolutely! Homemade dough works just as well and can add personal flavor to your breadsticks.
2. How do I make them spicier?
Add red pepper flakes or diced jalapeños to the cheese filling for a kick.
3. Can I make these ahead of time?
You can prepare the dough and garlic butter mixture in advance. Just assemble and cook when you’re ready to serve!
4. Can I freeze them?
Yes! Follow the storage tips provided, and they’ll be perfect for future cravings.
5. What’s the best way to store them?
Store in an airtight container in the fridge for up to 3 days or freeze for 2 months.
6. What if I don’t have an air fryer?
Don’t worry! You can bake these in a traditional oven at 400°F (200°C) for about 12-15 minutes.
7. Are these vegetarian?
Yes! They are vegetarian-friendly. Just swap cheese for dairy-free options if needed.
Conclusion
Now that you know how to whip up these Easy Air Fryer Cheesy Garlic Breadsticks, it’s time to get cooking! Treat yourself and your loved ones to this carby goodness that’s sure to become the highlight of your mealtime – plus, they’re totally Instagrammable! Don’t forget to snap a pic and show off your culinary creation on social media. 📸✨
If you enjoyed this recipe, drop a comment below, and let me know how yours turned out! Questions? I’m here for it! And hey, if you loved it, don’t keep it to yourself – share this recipe with your foodie friends! Happy cooking, and may all your meals be fabulous! xoxo 💕
Printable Recipe Card
Want just the essential recipe details without scrolling through the article? Get our printable recipe card with just the ingredients and instructions.


Comments