
Deliciously Easy Strawberry Bars: Your New Favorite Summer Treat!
Table of Contents
Introduction
Summer is here, and with it comes the delightful opportunity to embrace one of the season’s sweetest gifts: strawberries! There’s something utterly irresistible about juicy, plump strawberries, whether they’re fresh from the market or glistening in a delectable dessert. Strawberry Bars have become a summertime staple in many households, offering a delightful balance of sweetness and tartness, all wrapped up in a buttery, crumbly crust. If you’re looking for a treat that embodies the essence of summer while being simple enough for any baking novice, then these Deliciously Easy Strawberry Bars might just become your new favorite recipe!
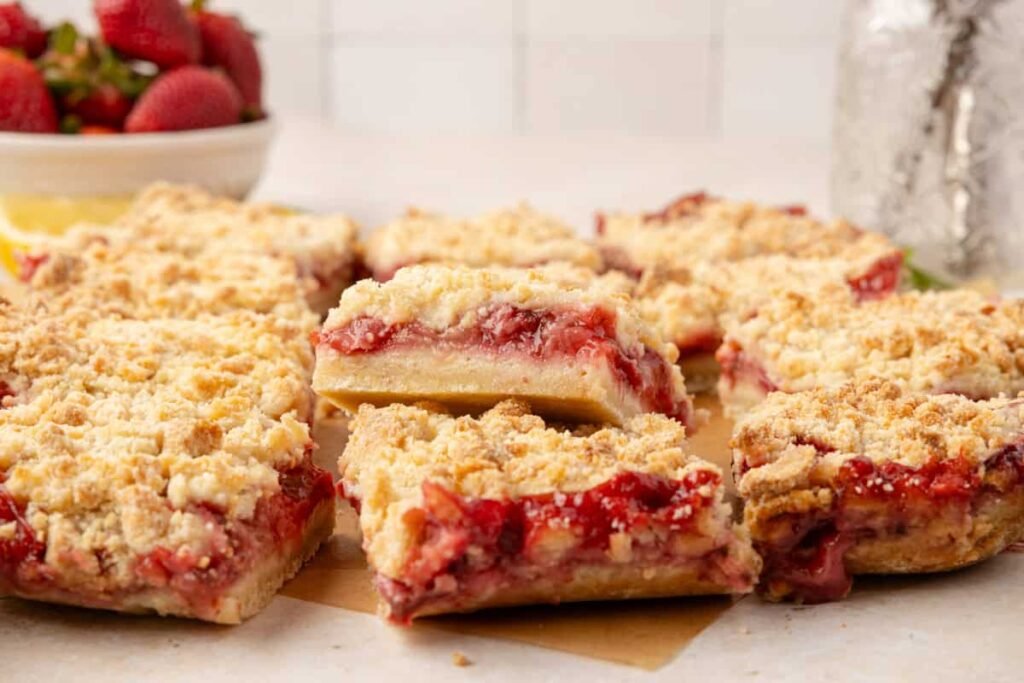
Imagine sinking your teeth into a vibrant strawberry bar, where the first bite reveals a luscious, fruity filling complemented by a crunchy crumble topping. It’s a delightful contrast that dances on your palate with every mouthful, making it impossible to resist a second – or third! These bars are perfect for casual family gatherings, backyard barbecues, or simply for your afternoon snack with a refreshing glass of lemonade. Plus, they are incredibly versatile; you could add a scoop of vanilla ice cream on top or serve them with fresh whipped cream. Just picture yourself enjoying a sun-drenched afternoon, sharing these delightful treats with friends and loved ones, making memories that will last long after the summer sun has set.
As you gather ingredients for this easy and budget-friendly recipe, you’ll also appreciate the joy of baking. Not only do these strawberry bars taste divine, but the simple process makes it fun to involve your family, teaching little ones the magic of creating something delicious in the kitchen. It’s an added bonus that they are a fantastic way to showcase those fresh strawberries bursting with flavor right now, making this recipe not just delectable but also seasonally appropriate. Get ready to bring a slice of summer into your kitchen with these mouthwatering Deliciously Easy Strawberry Bars!
Budget Information
Now, let’s talk about affordability. This recipe is incredibly budget-friendly, with a total cost of ingredients typically ranging between $8 to $12, depending on local produce prices and any sales you can catch. Best of all, many of the ingredients are pantry staples, such as flour, sugar, and butter. This makes it easy to whip up a batch without needing a long grocery list or breaking the bank. Moreover, this recipe yields approximately twelve bars, making it perfect for feeding large families or sharing with friends. For those looking to watch their spending or create something delightful for gatherings, these Strawberry Bars tick all the right boxes!
Why This Recipe Works
This recipe works wonderfully for a myriad of reasons. Firstly, it’s incredibly beginner-friendly! You don’t have to be a professional baker to achieve great results, as the instructions are straightforward and easy to follow. The simplicity of the ingredients also allows the fresh strawberry flavor to shine, resulting in bars that are bursting with fruitiness and love.
Additionally, this recipe is quite flexible. If you’re feeling adventurous, you can incorporate other berries like blueberries or raspberries, or even add a pinch of cinnamon for an extra flavor kick. It’s adaptable to suit personal preferences or ingredient availability. Plus, you can go ahead and make it gluten-free by swapping in a simple gluten-free flour blend!
Moreover, these bars carry natural sweetness from fresh strawberries, making them a healthier alternative to many store-bought desserts. Packed with fiber from the fruit and not overly laden with sugar, they provide a refreshing and guilt-free indulgence that you won’t hesitate to savor on a sunny afternoon.
Ingredients + Optional Substitutions
Here’s what you’ll need for these Deliciously Easy Strawberry Bars:
- 2 cups all-purpose flour (or a gluten-free flour blend)
- 1 cup granulated sugar
- 3/4 cup unsalted butter, cold and diced
- 1/2 teaspoon salt
- 1 large egg
- 2 cups fresh strawberries, sliced (frozen strawberries will work as well if thawed and drained)
- 1 tablespoon lemon juice (freshly squeezed)
- 2 tablespoons cornstarch (for thickening)
- 1/2 cup strawberry jelly (or use strawberry preserves for a more natural flavor)
Optional ingredients for garnish:
- Whipped cream (store-bought or homemade)
- Extra fresh strawberries for topping
- Powdered sugar for dusting
With these staples in hand, you’re all set to bake up a storm!
Equipment
To get started with your strawberry bar adventure, you’ll need the following equipment:
- 9×13 inch baking pan
- Parchment paper (for easy removal)
- Mixing bowls (both large and medium)
- Measuring cups and spoons
- Silicone spatula (or wooden spoon)
- Mixer (hand or stand mixer)
- Cutting board (for slicing strawberries)
- Knife (for cutting the strawberries and later, the bars)
These basic tools will make the baking process seamless and enjoyable!
Step-by-Step Recipe Instructions
Now let’s roll up our sleeves and get down to business with this delightful recipe!
Step 1: Preheat and Prepare the Pan
Begin by preheating your oven to 350°F (175°C). This step is crucial as you want the bars to bake evenly. Next, take your 9×13 inch baking pan and line it with parchment paper. This will help to prevent the bars from sticking, making it easier to lift them out once they’re baked. For extra assurance in non-stick, lightly grease the pan with a splash of cooking spray or butter.
Step 2: Making the Crust and Crumble Topping
In a large mixing bowl, combine 2 cups of all-purpose flour and 1 cup of sugar with 1/2 teaspoon of salt. Mix these dry ingredients thoroughly to ensure even distribution. Now, it’s time to incorporate the cold, diced butter. Using your hands, pinch the butter into the flour mixture until you see small pea-sized pieces form. This is important because it creates the crumbly texture that holds the bars together.
Once you’ve reached that crumbly point, add the beaten egg and mix it in until just incorporated. You’ll want to be careful to not overwork the dough as this can lead to a tough crust. Now, set aside 2/3 of this mixture to create the base of your bars. Press this reserved dough into the bottom of your prepared pan, evenly spreading it with your hands or the back of a spatula.
Step 3: Prepare the Strawberry Filling
In a medium-sized mixing bowl, stir together 2 cups of sliced fresh strawberries, 1 tablespoon of lemon juice, 2 tablespoons of cornstarch, and 1/2 cup of strawberry jelly. Fold the ingredients together gently, allowing the strawberries to be coated evenly. The cornstarch acts as a thickener, helping to bind the strawberries while they bake and preventing a soggy filling. Once thoroughly mixed, pour this luscious strawberry mixture over the crust in the baking pan, spreading it evenly.
Step 4: Create the Crumble Topping and Bake
Now it’s time to sprinkle the reserved crumble topping over the strawberry layer. Use the remaining mixture to cover the strawberries fully. This step will create a beautiful, golden crust as it bakes!
Carefully slide your prepared pan into the oven and bake it for around 40 to 45 minutes. You’ll know it’s ready when the top is golden brown and slightly firm to the touch. As it bakes, your kitchen will fill with the delicious aroma of warm strawberries and buttery goodness — this is when the excitement begins to build!
Step 5: Cooling and Serving
Once the timer goes off, carefully remove the pan from the oven and allow the bars to cool completely in the pan. This is an important step! Once cooled, lifting the bars out using the parchment paper is easy. Cut them into squares or rectangles using a sharp knife, and prepare to serve! You can enjoy these bars warm, at room temperature, or chilled. For an extra special touch, consider topping them with a dollop of whipped cream or a few more fresh strawberries. Dusting with powdered sugar is also a cute idea for presentation!
Nutritional Facts
Here’s a basic rundown of the nutritional value for one serving (assuming you cut the bars into twelve servings):
- Calories: 356 kcal
- Protein: 5 g
- Carbohydrates: 65 g
- Fat: 9 g
- Fiber: 3 g
- Sugar: 36 g
- Sodium: 212 mg
Dietary Tags: Vegetarian, Nut-Free.
Storage and Reheating Tips
Storing your Deliciously Easy Strawberry Bars properly is key to keeping them fresh!
- In the Fridge: They can last for about 4-5 days when stored in an airtight container.
- Freezer Options: These bars can be frozen for up to 3 months. Be sure to place them in an airtight, freezer-safe container, separating layers with parchment paper to avoid sticking.
For reheating, you have several options:
- Microwave: For a quick thaw, put the bars on a microwave-safe plate and warm individual servings for 20-30 seconds until they reach your desired temperature.
- Oven: Preheat your oven to 350°F (175°C) and place the bars in for about 10-15 minutes. Cover them with aluminum foil to prevent over-browning.
No matter how you choose to enjoy them, these strawberry bars are sure to bring a taste of summer whenever you want!
Serving Suggestions
While these bars are delicious on their own, they can be elevated with some fabulous pairing options:
- Serve Warm: Enjoy them fresh out of the oven, with melted vanilla ice cream creating a delightful contrast in temperature.
- Chilled: Slice and enjoy straight from the fridge for a refreshingly cool treat.
- Garnishes: Top with a sprinkle of powdered sugar, or a dollop of whipped cream and fresh strawberry slices to make them extra special for gatherings or special occasions.
- Beverage Pairings: Serve alongside a cold glass of iced tea or a refreshing summery lemonade for the ultimate sweet snack experience.
Reader Tips or Helpful Notes
To help you with your baking adventures, here are some reader-inspired tips:
- Use Fresh Ingredients: Opt for fresh strawberries when in season, as they provide a burst of flavor that frozen ones sometimes lack.
- Cold Butter is Key: Always use cold butter for a crumbly texture. If only room-temperature butter is available, place it in the freezer for a bit.
- Don’t Overmix: Combine the dough just until mixed to avoid tough bars.
- Ingredient Adjustments: If your strawberries are particularly sweet, you can reduce the amount of sugar in the filling for a balanced taste.
- Try Hybrid Fruits: Get creative by mixing in blueberries, rhubarb, or even peaches with the strawberries for a unique twist!
- Pump up the Flavor: Add a splash of vanilla extract to the crust for a sweet hint of flavor.
- Parchment Paper Usage: Using parchment paper isn’t just convenient for lifting; it also helps with even baking.
- Room Temperature: Let bars cool at room temperature before slicing for cleaner cuts.
- Avoid Steamy Conditions: If your kitchen is excessively humid, allow the bars to cool in a draft-free area for best results.
- Share with Friends: These are bound to become a communal favorite; double the recipe for gatherings!
Recipe FAQs
1. Can I use frozen strawberries instead of fresh?
Yes, you can use frozen strawberries, but make sure to thaw and drain them completely before using to reduce excess moisture.
2. How do I store leftover Strawberry Bars?
Store leftover strawberry bars in an airtight container in the refrigerator for 4-5 days. Alternatively, you can freeze them for up to 3 months.
3. What can I use instead of strawberry jelly?
Strawberry preserves or even homemade strawberry compote can be used instead of strawberry jelly for a more natural flavor.
4. How can I ensure the crust is not soggy?
Be sure to combine the strawberries with cornstarch and lemon juice before adding them on top of the crust. This mixture helps absorb excess moisture.
5. Can I add other fruits to the recipe?
Absolutely! Feel free to mix in other berries or choose your favorites. Blueberries and raspberries complement strawberries beautifully!
6. What’s the best way to reheat the bars?
You can reheat individual servings in the microwave for about 20-30 seconds or in the oven at 350°F (175°C) for 10-15 minutes to warm them back up.
Conclusion
With their luscious strawberry flavor and delightful crumbly texture, these Deliciously Easy Strawberry Bars are not just a treat; they’re a celebration of every sunny moment summer has to offer! Whether enjoyed alone or shared with friends and family, each bite promises a burst of sweet nostalgia that will transport you back to endless sunny days. We invite you to try your hand at this enchanting recipe and watch as it becomes a family favorite in no time at all.
Don’t forget to leave a review and let us know how your bars turned out! Share your creations on social media, tagging us so we can marvel at your baking prowess. Happy baking! 🍓✨
