Table of Contents
Introduction
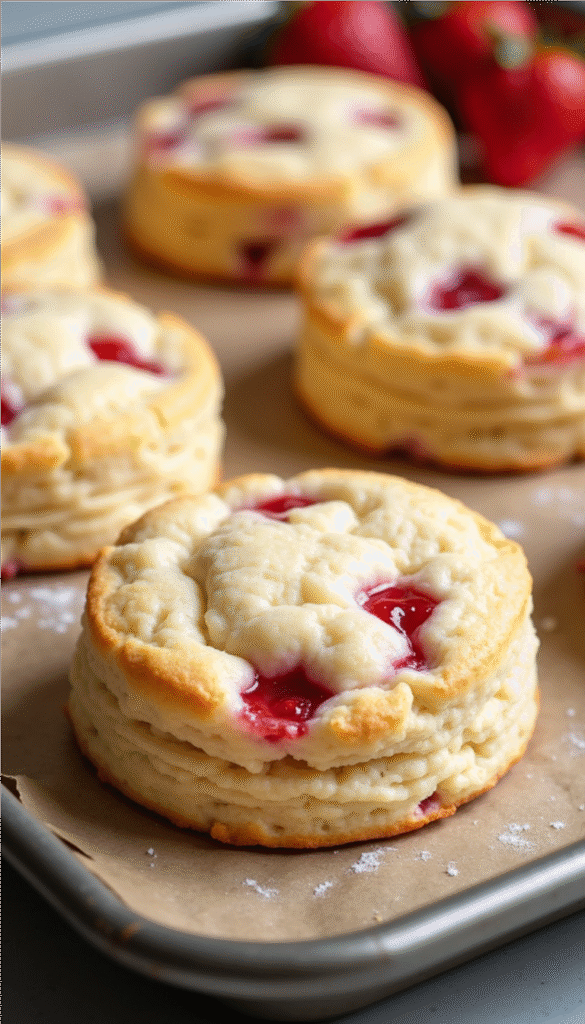
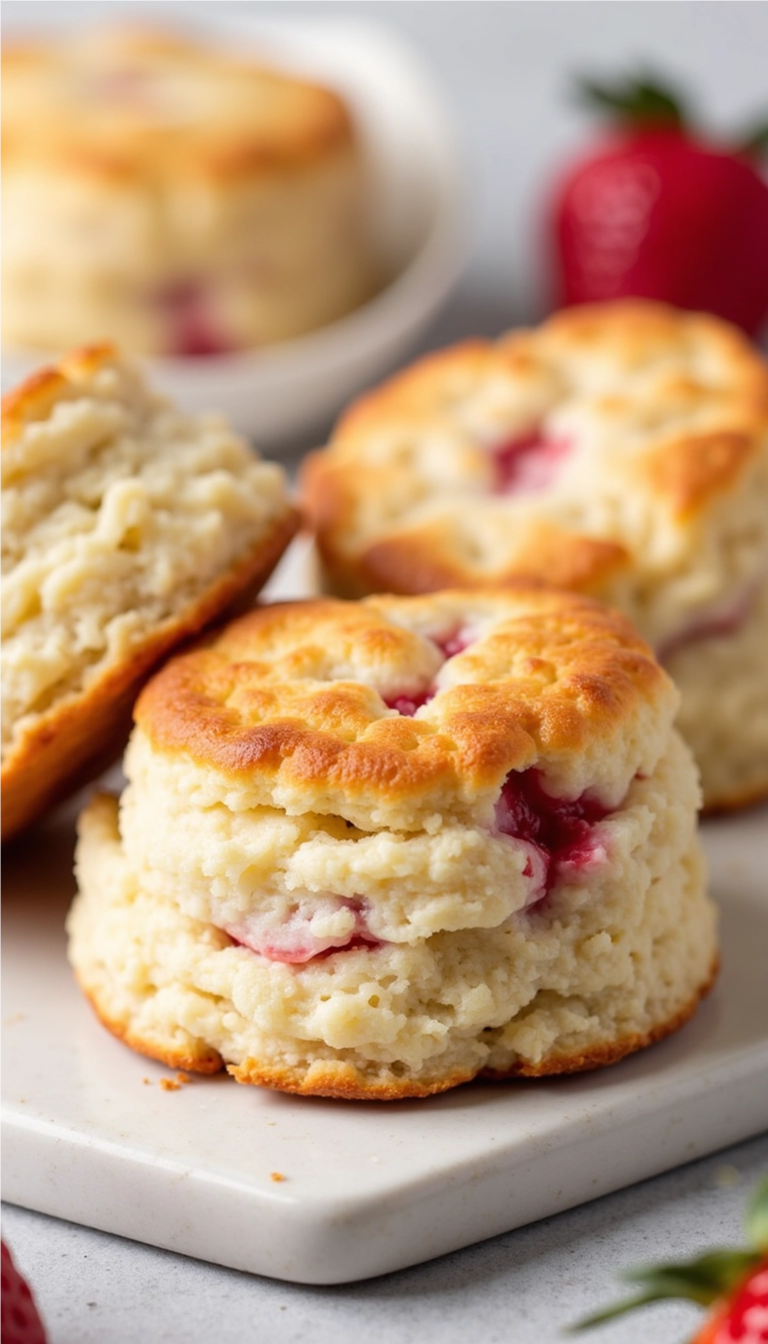
Welcome to the ultimate sweet escape, where I share a scrumptious recipe guaranteed to elevate any meal—introducing the Sweet & Flaky Strawberry Biscuits! Imagine buttery, flaky layers embracing chunks of juicy strawberries, creating a harmonious blend that dances on your taste buds. These delightful biscuits are not only a feast for the eyes but also a treat for the soul, making them a must-have for brunches, picnics, or just a sweet late-night indulgence.
Picture this: It’s a sunny Sunday morning, and the smell of freshly baked strawberry biscuits fills your kitchen, wrapping you in warmth and nostalgia. These little beauties are perfect for breakfast, a delightful addition to afternoon tea, or a sweet treat after dinner. They also make a fabulous centerpiece for holiday gatherings and special occasions, bringing joy to every table. Plus, with strawberries being in season during the summer months, there’s no better time to bask in their vibrant flavors and make this delectable recipe shine.
Now, if you think biscuits are boring, think again! These strawberry biscuits take the classic comfort food to a whole new level. Soft, crumbly, and lightly sweetened, with a drizzle of dreamy vanilla glaze on top, they will have you swooning with each bite. Trust me, once you try these, they’ll become your go-to dessert to impress your friends or treat yourself after a long week. Let’s dive into this scrumptious journey and whip up some Sweet & Flaky Strawberry Biscuits that will transform your culinary dreams into reality!
Budget Information
The best part about these Sweet & Flaky Strawberry Biscuits? They’re super budget-friendly! Let’s break down the costs of each ingredient so you can see how easy it is to whip up a batch without breaking the bank.
- All-Purpose Flour (4.5 cups): Approx. $1.50
- Granulated Sugar (2 tbsp): Approx. $0.10
- Unsalted Butter (1.5 cups): Approx. $3.00
- Buttermilk (1.5 cups): Approx. $1.50
- Large Egg (1): Approx. $0.20
- Diced Strawberries (2 cups): Approx. $4.00
- Baking Powder (2 tbsp): Approx. $0.10
- Baking Soda (1 tsp): Approx. $0.05
- Kosher Salt (2 tsp): Approx. $0.05
- Egg for Egg Wash (1): Approx. $0.20
- Vanilla Glaze:
- Powdered Sugar (1 cup): Approx. $0.50
- Milk (2 tsp): Approx. $0.02
Estimated Total Cost: Approximately $11.22
With this total, you can create about a dozen decadent biscuits, making them an affordable treat for yourself, a gathering, or a family brunch! Perfect for large families or those just wanting a sweet fix, these biscuits utilize pantry staples and ensure you don’t have to splurge while satisfying your cravings.
Why This Recipe Works
If you’re wondering why these Strawberry Biscuits deserve a permanent spot in your recipe rotation, here’s what makes this recipe truly special! First off, its ease of preparation allows even beginner bakers to shine like pros in the kitchen. The beauty of these biscuits lies in their flexibility—whether you’re using fresh strawberries, frozen ones, or even switching to alternative fruits, this recipe adapts beautifully to your pantry’s offerings.
Moreover, the combination of cold butter and buttermilk ensures a creamy texture that keeps each biscuit light and fluffy. It’s a fantastic way to impress your family and friends with something that looks and tastes gourmet yet is deceptively simple to prepare. Not to mention, these Strawberry Biscuits lend themselves wonderfully to modifications. Want to make them gluten-free? Swap out the all-purpose flour for a blend that suits your dietary needs.
Additionally, with a hint of protein from the egg and plenty of vitamins from the fresh strawberries, these biscuits aren’t just delightful; they’re not too shabby nutrition-wise either! So dive in, create something extraordinary, and bask in the glorious smell wafting through your kitchen. These Strawberry Biscuits will undoubtedly become a family favorite!
Ingredients + Optional Substitutions
Here are all the fabulous ingredients you’ll need to create your Sweet & Flaky Strawberry Biscuits, complete with some chic substitutions for flexibility:
-
4.5 cups all-purpose flour
- Substitution: Gluten-free flour for a gluten-free option.
-
2 tablespoons granulated sugar
- Substitution: Coconut sugar or honey for a more natural sweetener.
-
2 tablespoons aluminum-free baking powder
- Note: Always use aluminum-free baking powder for a cleaner taste.
-
1 teaspoon baking soda
-
2 teaspoons kosher salt
-
1.5 cups unsalted butter (cold)
- Substitution: Vegan butter if dairy-free.
-
1.5 cups buttermilk (cold)
- Substitution: Greek yogurt thinned with milk or plant-based milk with a splash of lemon juice as a substitute for buttermilk.
-
1 large egg
- Substitution: 1 tablespoon of flaxseed meal mixed with water for a flax egg to make this vegan-friendly.
-
2 cups diced strawberries (about 10 strawberries)
- Substitution: Feel free to experiment with different berries, like raspberries or blueberries!
-
1 egg for egg wash (optional)
Glaze Ingredients:
-
1 cup powdered sugar
-
1/2 vanilla pod (scraped) or 1 teaspoon vanilla extract
-
2 teaspoons milk of choice
- Substitution: Any non-dairy milk such as almond, oat, or soy.
-
Flaky sea salt for topping (optional)
Equipment
To whip up these divine Strawberry Biscuits, you’ll need a few basic tools:
- 1 large mixing bowl
- 1 whisk or fork
- 1 box grater (for grating butter)
- 1 measuring cup and measuring spoons
- 1 3-inch biscuit cutter (or any round cutter)
- 1 pastry brush (for egg wash)
- 1 baking sheet lined with parchment paper
- 1 cooling rack (optional, but recommended for cooling)
Step-by-Step Recipe Instructions
Yield: 12–15 flaky biscuits
Now, let’s get our hands doughy with this detailed step-by-step guide on how to make these tasty Sweet & Flaky Strawberry Biscuits!
-
Prep the Ingredients: Begin by preheating your oven to 400°F (200°C) and lining a baking sheet with parchment paper. Gather all your ingredients, ensuring they’re pre-measured and ready to go. This will streamline the process and make it a breeze to navigate through the recipe.
-
Mix the Dry Ingredients: In a large mixing bowl, combine the all-purpose flour, baking powder, baking soda, sugar, and kosher salt. Use a whisk or fork to mix these ingredients thoroughly. The goal here is to ensure that all the leavening agents are evenly distributed throughout the flour so every biscuit rises beautifully.
-
Shred the Butter: This step is crucial for achieving the flaky texture we love in biscuits! Using a box grater, shred 1.5 cups of cold unsalted butter into the dry mixture. After grating, put the mixture in the freezer for about 10 minutes. Cold butter creates steam during baking, resulting in a super flaky biscuit, which is the holy grail of biscuit-making.
-
Prepare the Wet Ingredients: In a separate small bowl, whisk together the cold buttermilk and large egg until fully combined. Set this mixture aside. The buttermilk adds moisture and tenderness to the biscuits, while the egg enriches the dough with flavor and helps with structural integrity.
-
Combine the Mixtures: Retrieve your dry mixture from the freezer and gently break up any large clumps of butter. Add in the diced strawberries, ensuring they are well-coated with flour to prevent them from sinking while baking. Next, pour in your buttermilk and egg mixture, stirring gently. Be careful not to overmix—just until the dough comes together! This creates a tender biscuit rather than a tough one.
-
Roll Out the Dough: Lightly flour your work surface and dump the dough onto it. With a rolling pin, roll the dough to about ¾ inch thick. Resist the urge to overwork the dough; it’s completely okay if it looks a bit rough. The key is to handle the dough minimally so the biscuits stay light and flaky.
-
Cut Out the Biscuits: Using your biscuit cutter, cut out circles and place them on the prepared baking sheet. Avoid twisting the cutter; simply press straight down and lift. This helps keep the edges from sealing and promotes a good rise. Gather any scraps and press them together to cut out more biscuits.
-
Chill Out: Before baking, pop the cut biscuits into the freezer for about 15 minutes. Chilling the dough helps retain the cold temperatures, ensuring that the rich butter remains solid until the biscuits hit the oven, resulting in a flakier texture post-bake.
-
Add the Egg Wash: Whisk together one egg with a tablespoon of water to create an egg wash and brush the tops of the chilled biscuits. This will give them a beautiful golden color and a slight crunch on the outside, making them look insta-worthy.
-
Bake & Glaze: Place the baking sheet in your preheated oven and bake for 13-15 minutes, or until the biscuits are tall, golden, and smell absolutely divine! Once baked, remove them from the oven, and while they’re still warm, drizzle the vanilla glaze over the top. This sweet finishing touch is the crown jewel on your delicious biscuits!
Prep Time: 20 mins
Cooking Time: 15 mins
Total Time: 35 mins
Nutritional Facts
Yield: 12–15 flaky biscuits
Let’s get all the info on what you’re treating your body to! Here’s the approximate nutritional information per serving (1 biscuit):
- Calories: 427
- Protein: 6g
- Carbohydrates: 48g
- Fat: 24g
- Fiber: 1g
- Sugar: 12g
- Sodium: 555mg
These biscuits may contain moderate sugar and fat, but they also boast the natural sweetness and vitamins from fresh strawberries, so treat yourself guilt-free!
Dietary Tags:
- Vegetarian
- Dairy-Free Optional (with vegan butter + plant-based milk)
- Gluten-Free Adaptable (using gluten-free flour blend)
- Egg-Free Optional (with flax egg substitution)
- Refined Sugar Optional (swap granulated sugar for coconut sugar or honey)
- Nut-Free
- Soy-Free Optional (choose soy-free vegan butter and milk)
Dietary Tags: Vegetarian, Can be made gluten-free or dairy-free as desired.
Storage and Reheating Tips
Keep the biscuit love alive! Here are some savvy storage tips to ensure your Strawberry Biscuits stay just as fabulous as when they first baked:
-
Fridge: Store leftover biscuits in an airtight container at room temperature for 2-3 days.
-
Freezer: You can freeze these biscuits before baking or after! For unbaked biscuits, place them on a baking sheet in the freezer until solid, then transfer them to a freezer bag for up to 3 months.
-
Best Containers: Use airtight containers for room temperature storage, and freezer-safe bags for freezing.
Reheating Methods:
To reheat your biscuits while keeping that fabulous flaky texture intact, try one of these methods:
-
Microwave: Heat for about 10-15 seconds or until warm, keeping in mind this could make them a tad softer.
-
Oven: Preheat your oven to 350°F (175°C) and warm them for about 5-7 minutes, allowing them to crisp up again.
-
Air Fryer: If you’re team air fryer, simply pop them in at 350°F (175°C) for about 5 minutes. Voilà, fresh out of the oven textures!
Serving Suggestions
To serve these beauties at their best, I highly recommend enjoying them warm, straight from the oven, glistening with irresistible vanilla glaze. For a delightful twist, consider serving them with a side of fresh whipped cream or a scoop of ice cream for an indulgent dessert, or pair them with your favorite fruit preserves and a cup of tea for a lovely afternoon treat.
Feel free to get creative with the beverages too! These biscuits pair beautifully with a hot cup of coffee, a refreshing iced tea, or even a glass of lemonade to balance out the sweetness.
Reader Tips or Helpful Notes
Here are some delightful tips straight from my kitchen to make your strawberry biscuit experience effortlessly chic and oh-so-delicious:
-
Chill Your Tools: This includes your mixing bowl! A chilled bowl further contributes to the flakiness of the biscuits.
-
Mix Wisely: When combining wet and dry ingredients, stir delicately until just combined. Overmixing activates the gluten, leading to a denser biscuit!
-
Play with Flavors: Add lemon zest or a touch of cinnamon in the dough for a unique flavor profile.
-
Keep the Strawberries Whole: Instead of chopping them, you can slice them into halves for larger chunks—yummy bites!
-
Egg Wash Alternatives: If you want to keep it vegan, brush with a mixture of almond milk and maple syrup when it comes to that golden shine.
-
Customize Your Glaze: Feel free to swap out the vanilla for almond extract if you’re feeling adventurous!
-
Baking Sheet Placement: Always bake your biscuits on the upper middle rack for evenly baked goodies.
-
Double the Batch: These biscuits freeze beautifully, so why not double the recipe and stock your freezer for last-minute cravings?
-
Test for Doneness: Look for slightly golden-brown tops and a tall body to ensure they’ve baked through properly.
-
Don’t Skip the Chill: Resting the dough in the fridge helps the flavors meld together beautifully. This step is key for achieving perfect results.
Recipe FAQs
Got burning questions about these delicious Strawberry Biscuits? I’ve got you covered! Here are some frequently asked questions to help you along the way:
-
Can I use frozen strawberries instead of fresh?
Absolutely! Just make sure to thaw them and drain excess moisture before mixing them into the dough. -
What if my biscuits come out too dry?
If your dough seems dry, add extra buttermilk one tablespoon at a time until it reaches the desired consistency. -
Can I prepare the dough ahead of time?
Yes! You can make the dough and shape the biscuits up to one day in advance. Just keep them wrapped in the fridge or frozen until ready to bake. -
What can I substitute for buttermilk?
You can create a simple buttermilk alternative by combining 1 cup of milk (dairy or plant-based) with 1 tablespoon of lemon juice or vinegar; let it sit for 5 minutes before using. -
Why did my biscuits not rise properly?
The most common reason is that the baking powder is no longer active. Always check the expiration date and make sure your butter remains nice and cold to create that flakiness. -
What’s the best way to enjoy these biscuits?
Warm! They are delightful on their own or paired with butter, whipped cream, or a drizzle of honey.
Conclusion
So there you have it, fabulous friends! Your journey into the world of dreamy Sweet & Flaky Strawberry Biscuits is just beginning, and I can’t wait for you to try this delightful recipe in your very own kitchen. Dive into the fantastic flavors of fresh strawberries paired with a buttery biscuit base, topped with an irresistible glaze—what’s not to love?
I hope this recipe sparks joy and creativity for your baking adventures! Don’t forget to share your experience, leave a review, and ask any questions you might have in the comments below. I’d love to hear all about your delicious creations and see your beautiful photos on social media, so be sure to tag me! Until next time, happy baking, and may your kitchen always be filled with love, laughter, and the sweet scent of freshly baked treats! 🍓💖✨
Printable Recipe Card
Want just the essential recipe details without scrolling through the article? Get our printable recipe card with just the ingredients and instructions.


Comments