
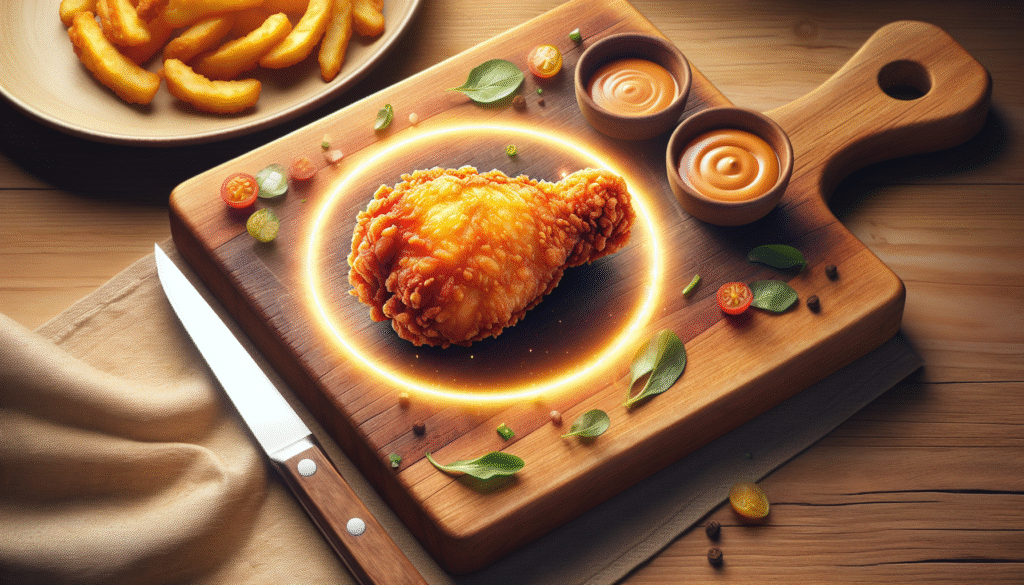
Unlock the Secret to Perfectly Crispy Fried Chicken Every Time: Easy and Affordable Recipe
If there’s one dish that embodies comfort food, soul food, and finger-licking goodness, it’s crispy fried chicken. Whether it graces your dinner table on a casual weeknight or serves as the star at a festive gathering, perfectly fried chicken never fails to impress. Imagine succulent, juicy meat encased in a golden-brown crust that crackles with each bite—a delectable meal that’s loved by all ages. Today, we’re diving deep into a recipe that ensures crispy fried chicken every time, turning any ordinary meal into a celebration.
Fried chicken has a rich cultural history, especially within Southern cuisine, where it’s often served during Sunday dinners, picnics, and family reunions. The combination of seasoned flour and buttermilk elevates the dish, enhancing the flavor while ensuring moisture is sealed inside. This dish isn’t just a feast for the eyes; it’s also a crowd-pleaser that can bring family and friends together.
In this recipe, you’ll discover how to achieve that perfect balance of crispy exterior and juicy interior without the guesswork. Let’s embark on this culinary journey to make the best fried chicken you’ve ever tasted—from preparation to serving, we’ll cover every detail!
Table of Contents
Budget Information
When it comes to delicious and satisfying meals, this crispy fried chicken recipe ranks high in affordability. With an estimated cost of around $15 to $20 for a family-sized portion, it’s easy on the wallet while being rich in flavor. Most of the ingredients are pantry staples, making it a practical option for those who want a hearty meal without breaking the bank. Perfect for large families, this recipe makes sure there are enough servings to go around, and it even shines as a budget-friendly option for gatherings and celebrations.
Why This Recipe Works
What sets this crispy fried chicken recipe apart from the rest? Several key factors ensure you’ll end up with a plateful of flavor that’s sure to impress. First, the use of buttermilk tenderizes the chicken, allowing it to absorb all the delicious flavors without becoming tough. This technique locks in moisture, ensuring every bite is juicy.
Next, this recipe employs a unique frying technique that utilizes high heat to achieve initial browning, then switches to a lower temperature for cooking, before cranking the heat back up to finish. This method ensures the crust is not only crispy but that the chicken is thoroughly cooked without drying out.
Lastly, you can adjust the seasoning to fit your preferences—perhaps adding your favorite spices or herbs for an extra flavor kick. With the right ingredients and method, you’ll be surprised at how effortlessly you can replicate restaurant-quality fried chicken at home!
Ingredients + Optional Substitutions
To make this crispy fried chicken, gather the following ingredients:
-
4 pounds of Chicken: Select a whole chicken cut into pieces or your favorite combination (breasts, drumsticks, wings, thighs).
- Substitutions: You can use boneless chicken pieces if preferred, but bone-in pieces usually yield better results.
-
2 cups Buttermilk: This acidic ingredient tenderizes the chicken while helping the flour stick.
- Substitutions: If you don’t have buttermilk, you can make a quick substitute by mixing 2 cups of milk with 2 tablespoons of vinegar or lemon juice.
-
2 cups All-Purpose Flour: This provides the base for the crispy coating.
- Substitutions: Whole wheat flour can be used for a healthier option, though it may alter the texture slightly.
-
1 tablespoon Paprika: For an added smoky flavor and a lovely red hue.
- Substitutions: Smoked paprika or cayenne pepper can add additional heat and flavor.
-
1 tablespoon Salt: Essential for enhancing the chicken’s natural flavor.
- Substitutions: You may use garlic salt, onion powder, or seasoning blends for something different.
-
1 teaspoon Black Pepper: A standard seasoning to balance the flavors.
- Substitutions: Adjust based on your spice preference or replace with white pepper for a milder taste.
-
Vegetable Oil for frying: A high smoke point oil is crucial for frying.
- Substitutions: Other suitable oils include canola oil, peanut oil, or even lard for an authentic flavor.
-
Optional Garnishes: Fresh herbs like parsley or cilantro for a touch of color and flavor.
Equipment
Before you start, make sure you have the following tools and equipment on hand:
- Large mixing bowl
- Zip-top bags
- Whisk or fork
- Measuring cups and spoons
- Skillet or deep-fryer
- Cooking thermometer (for oil temperature)
- Wire rack or paper towels for draining
- Tongs for flipping chicken
- Baking sheet (for resting the chicken)
Step-by-Step Recipe Instructions
1. Prepare the Chicken
To get started, first, wash your chicken pieces under cold water and pat them dry using paper towels. This step is crucial as it helps the buttermilk adhere better to the chicken. If you’ve chosen to use a whole chicken, cut it into pieces for even cooking. Removing the skin is optional depending on your health preferences, but leaving it on usually yields a more decadent flavor and texture.
2. Marinate in Buttermilk
Next, pour the buttermilk into a large mixing bowl and immerse the chicken pieces entirely. Cover the bowl with plastic wrap or a lid and place it in the refrigerator to marinate for at least 1-2 hours, or overnight if possible. This allows the acidity in the buttermilk to tenderize the chicken, ultimately leading to a juicier final product. The chicken should feel somewhat thicker as it marinates, a perfect sign that the buttermilk is working its magic.
3. Prepare the Coating
In a separate zip-top bag, combine the flour, paprika, salt, and black pepper. Seal the bag and shake it until the ingredients are well combined. This step is crucial as it ensures an even distribution of seasoning across the chicken. If you’re craving something spicier, feel free to add additional seasoning like cayenne pepper to the mix. Now is also a great time to set your oil up by pouring about an inch of vegetable oil into your skillet, ensuring it’s ready for frying.
4. Dredge the Chicken
Once your chicken has marinated, take each piece out of the buttermilk and allow any excess to drip off. Introduce the chicken to the flour mixture in the bag. Seal the bag again and shake it well to coat the chicken evenly. You may choose to double-dredge by dipping the chicken back in the buttermilk and then into the flour mixture once more. This creates an extra crispy layer, elevating your chicken to an irresistible level. After dredging, lay the coated pieces on a baking sheet and let them rest for about 10 minutes. This rest period allows the coating to adhere better.
5. Fry the Chicken
With your coated chicken resting, it’s time to fry! In your preheated skillet, ensure the oil is at a temperature of 350°F (175°C) before adding the chicken. Use a cooking thermometer to check the oil’s temperature for the best frying results. Carefully lay the chicken skin side down in the hot oil. Avoid overcrowding the skillet; work in batches if necessary. Fry each piece for about 4-5 minutes on each side until a golden-brown color develops.
After both sides are browned, lower the heat to medium, cover the skillet with a lid, and let cook for about 25-30 minutes. During this time, the chicken will cook through, maintaining moisture while the skin crisps up. Remove the lid and turn the heat back to medium-high for the last few minutes of cooking for an extra crunchy outer layer.
6. Draining and Resting
Once the chicken is perfectly golden and crisp, carefully transfer it to a wire rack set over a baking sheet, or drain it on paper towels. Let the chicken rest for at least 5 minutes prior to serving. This rest time allows for any excess oil to drain, sealing in that residual moisture and flavor.
7. Serving Your Fried Chicken
Serve your crispy fried chicken hot, garnished with a sprinkle of chopped herbs if desired. This dish is best enjoyed fresh, but it can also be paired with an array of delicious sides or sauces that complement its richness.
Nutritional Facts
For those conscious of their dietary intake, here’s a breakdown of the nutritional facts per serving (approximately one piece of chicken):
- Calories: 400
- Protein: 30g
- Carbohydrates: 20g
- Fat: 25g
- Fiber: 1g
- Sugar: 1g
- Sodium: 600mg
This recipe is not gluten-free due to the use of all-purpose flour and contains allergens such as chicken and dairy. Adjustments may be made to accommodate specific dietary needs.
Storage and Reheating Tips
To store leftover fried chicken:
- Fridge Duration: Allow the chicken to cool completely, then transfer it to an airtight container. It’s best consumed within 3-4 days when refrigerated.
- Freezer-Safe or Not: While you can freeze fried chicken, it’s optimal to enjoy it fresh. If needed, place cooled chicken in an airtight, freezer-safe container or freezer bag for up to three months.
- Reheating Methods: The best way to reheat fried chicken while preserving its flavor and crunch is in the oven. Preheat your oven to 375°F (190°C), place the chicken on a baking sheet lined with parchment paper, and bake for about 15-20 minutes or until heated through. You can also reheat in an air fryer or pan-fry on low heat for a crispy exterior.
Serving Suggestions
Crispy fried chicken shines on its own but can be elevated with various accompaniments. Here are a few classic side dishes that complement it beautifully:
- Coleslaw: A tangy and creamy coleslaw balances the richness of fried chicken perfectly.
- Mashed Potatoes: Creamy mashed potatoes are a comfort food classic that pairs wonderfully with fried chicken.
- Cornbread: Sweet and savory cornbread rounds out the meal and adds texture.
- Pickles: The crunch and tang of pickles can cut through the richness, providing a refreshing contrast.
Additionally, serving it with hot sauce, honey, or ranch dressing allows everyone to customize their meal.
Reader Tips or Helpful Notes
Here are ten tested tips to enhance your crispy fried chicken-making experience:
-
Let the Chicken Marinate Longer: For deeper flavor, let the chicken soak in buttermilk overnight.
-
Monitor Oil Temperature Closely: Maintaining oil temperature is critical—too hot will burn the coating, and too cool will soggy it.
-
Use a Thermometer: Ensures chicken reaches an internal temperature of 165°F (75°C) for safe consumption.
-
Avoid Overcrowding: Fry chicken in batches to maintain consistent oil temperature and even cooking.
-
Experiment with Spices: Try adding garlic powder or onion powder for an extra flavor kick.
-
Choose the Right Oil: Oils like peanut oil can enhance the flavor and stand up to high heat.
-
Prepare Ahead: Pre-bread chicken and chill it for an hour before frying to help the coating adhere better.
-
Baking Sheet for Cooling: Always cool your fried chicken on a wire rack above a baking sheet to prevent steam from making it soggy.
-
Servings Size: Scale your recipe easily; just adjust the ingredient quantities while keeping ratios consistent.
-
Keep Leftovers Crisp: When reheating, avoid microwaving, as it may compromise that beloved crunch.
Recipe FAQs
-
Can I make this ahead of time?
Yes, you can marinate the chicken the night before and fry it the next day for a fresher taste. -
Can I freeze it?
Yes, after cooling completely, wrap the fried chicken tightly and freeze for up to three months. -
How can I make it vegan/gluten-free?
Use a plant-based chicken substitute and gluten-free flour for a delicious variation. -
Can I double the recipe?
Absolutely! Just ensure you have ample space in your frying vessel and adjust cooking times as needed. -
Is it spicy/kid-friendly?
The base recipe is mild; however, adjust spices according to your comfort level for kids. -
What are the best storage containers?
Airtight containers or resealable bags are excellent for keeping leftovers fresh. -
How long can I leave it out before refrigerating?
Food safety recommends refrigerating leftovers within two hours of cooking. -
Can I use an air fryer/Instant Pot instead?
Yes! Adjust the cooking time for air frying to about 20 minutes at 375°F, flipping halfway through. -
What are the most common mistakes to avoid?
Avoid rushing through the marination and dredging process—these are crucial for that perfect coating. -
How do I scale this for a party or meal prep?
Simply increase the ingredient amounts and use multiple frying pots or batch cook to accommodate larger quantities.
Conclusion
Now that you’ve unlocked the secret to perfectly crispy fried chicken, it’s time to gather your loved ones and enjoy this delectable dish. Don’t forget to share your experience—leave a review, ask questions, and showcase your culinary creations on social media. Happy frying!
