
Master the Art of Pho Ga: 5 Secrets for Irresistible Chicken Soup
If you’re looking for a heartwarming dish that wraps you in comfort, look no further than Pho Ga, Vietnam’s captivating chicken noodle soup. This aromatic soup, blending delicate chicken with fragrant herbs and spices, is not just a meal; it’s a celebration of culture, flavor, and tradition. With its tantalizing scents and delectable broth, Pho Ga is perfect for cozy family dinners, lively gatherings, or refreshing weekend brunches. Often enjoyed as a breakfast staple in Vietnamese households, this dish has transcended geographical boundaries to capture the hearts and palates of food lovers worldwide.
In this post, we’ll unveil the five secrets that make our Pho Ga irresistible and show you how to whip up this crowd-pleaser in the comfort of your own kitchen. You’ll discover not only how to prepare delicious Pho Ga but also learn about its nutritional benefits and creative serving suggestions. Get ready to immerse yourself in a fragrant culinary journey that your taste buds will thank you for!
Table of Contents
Budget Information
Affordability is a hallmark of homemade Pho Ga. The ingredients are economical, with the total cost hovering around $20, depending on your location and seasonal availability. This dish is perfect for families on a budget, as it can serve up to six hearty bowls. Plus, many of the ingredients, such as spices and rice noodles, are pantry staples that you may already have at home.
Why This Recipe Works
This Pho Ga recipe stands out for its complexity of flavors while remaining user-friendly. It’s designed for cooks of all skill levels, making it a fantastic option for family meals or impressing guests. The magic lies in the balance of spices, fresh herbs, and tender chicken, resulting in a broth that is rich yet light. This recipe also allows for flexibility: you can easily alter the ingredients to suit your taste preferences and dietary requirements. Not to mention, it’s packed with nutrients, providing protein from the chicken and a healthy dose of vegetables.
Ingredients + Optional Substitutions
To successfully prepare our Pho Ga boiler, you’ll need the following ingredients:
- 1 whole chicken (about 3-4 lbs)
(You can substitute with bone-in chicken thighs for a richer flavor) - 2 large onions, halved
(Shallots can be used if you want a sweeter profile) - 1 thumb-sized piece of fresh ginger, sliced
(Galangal is an excellent substitute if available) - 4-5 Star anise
- 3-4 Cloves
- 1 Cinnamon stick
- 1 tablespoon coriander seeds
- Salt to taste
- 4-5 liters of water
- 200 grams of rice noodles (bánh phở)
(Substitute with gluten-free noodles if needed) - Fresh herbs (Thai basil, cilantro)
(Mint leaves also make a nice addition) - Lime wedges for serving
- Chili slices for a spicy kick
(Optional, adjust to your heat preference) - Bean sprouts or bok choy for garnish
(One can replace these with other vegetables like spinach)
Optional garnishes:
- Fried shallots
- Sliced green onions
- Hoisin sauce (for dipping)
Equipment
Before diving into the cooking process, ensure you have the following kitchen tools handy:
- Large pot or Dutch oven
- Cutting board
- Knife
- Measuring cups and spoons
- Slotted spoon or mesh strainer
- Ladle
- Bowls for serving
- Tongs
- Fine mesh strainer (optional, for broth clarity)
Step-by-Step Recipe Instructions
1. Prepare the Broth
Begin your Pho Ga journey by creating a fragrant and flavorful broth, which is the heart of this dish. In a large pot or Dutch oven, combine the whole chicken, halved onions, sliced ginger, and water. Bring it to a gentle boil over medium-high heat, watching for any scum to rise to the surface. Skim this off with a slotted spoon. Let the broth simmer for about 10 to 15 minutes, then add in the star anise, cloves, cinnamon stick, and coriander seeds. This combination of spices will give your broth its signature aroma. Lower the heat to maintain a gentle simmer and cook for 1 to 1.5 hours, until the chicken is tender and cooked through. You’ll know it’s ready when the meat easily pulls away from the bone and the broth is aromatic and flavorful.
Pro Tip: Make sure to taste the broth periodically, adding salt to enhance the flavor gradually. Proper seasoning at this stage is crucial for a flavorful soup.
2. Post Cooking – Shred the Chicken
Once cooked, carefully remove the chicken from the pot using tongs. Allow it to cool slightly on a cutting board. While the broth continues to simmer, shred the chicken into bite-sized pieces, discarding the skin and bones. The meat should be moist and tender, easily coming apart with a fork or your hands. This shredded chicken will serve as the protein base for your Pho Ga, adding richness to every bowl.
Safety Reminder: Be cautious with hot broth and the chicken. Always utilize tongs or a slotted spoon to prevent any risk of burns.
3. Cook the Rice Noodles
In a separate pot, bring water to a rolling boil. Add the rice noodles and cook according to the package instructions, typically 4-6 minutes. You want them to be tender yet slightly firm, a texture known as ‘al dente’. Once they’re ready, drain and rinse them under cold water to stop the cooking process and prevent sticking. This ensures a perfect noodle finish in your soup.
Optional Variation: If you’re using a different noodle type, adjust the cooking time accordingly and follow the specific package instructions.
4. Assemble the Pho
With your broth, chicken, and noodles at the ready, it’s time to assemble your Pho Ga. In serving bowls, place a portion of the cooked noodles at the bottom. Top with a generous helping of shredded chicken. Carefully ladle hot broth over the noodles and chicken, allowing the vibrant flavors to meld together beautifully. Each bowl should be steaming, with the broth fragrant and enticing.
Aromatic Cue: Take a moment to breathe in the heavenly steam as you pour the broth, letting it warm your senses before indulging.
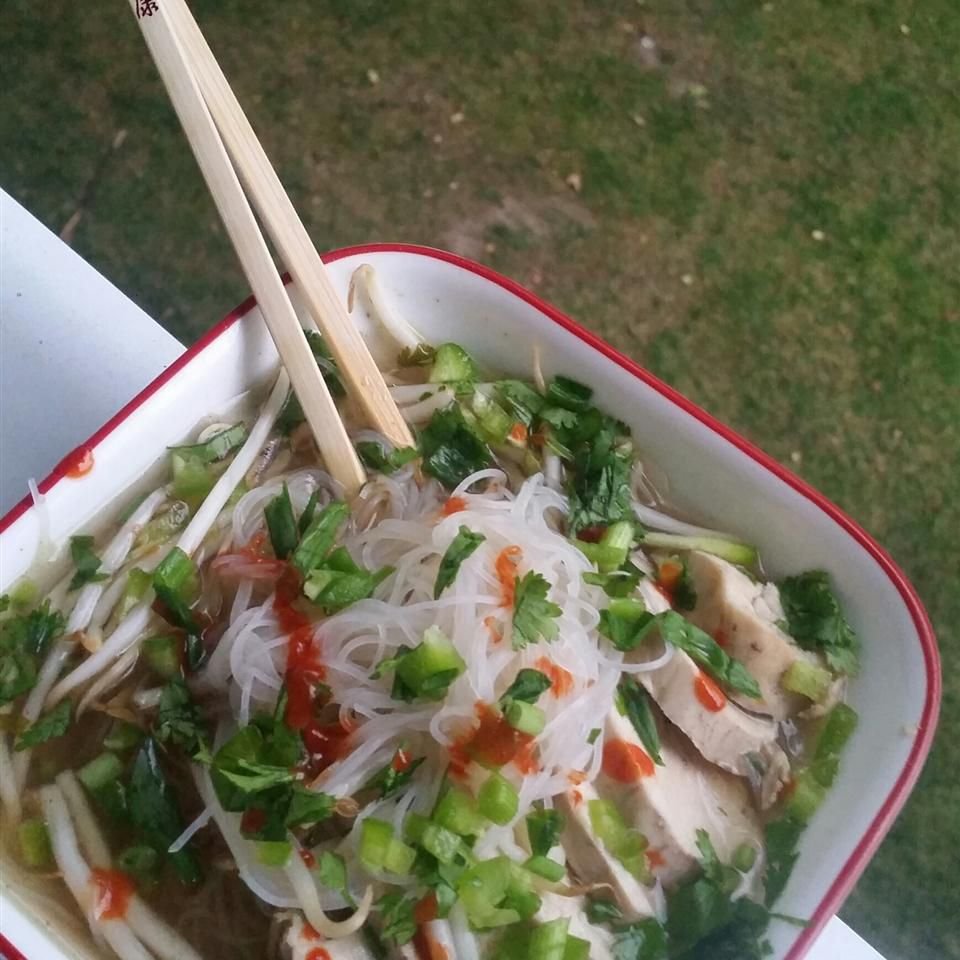
5. Garnish and Serve
Now comes the fun part! Garnish each bowl with fresh herbs such as Thai basil and cilantro, ensuring everyone can customize their Pho Ga to their liking. Add a squeeze of lime to brighten the flavors and a few slices of chili for those who prefer a little heat. Don’t forget to sprinkle bean sprouts, fried shallots, and sliced green onions atop the soup for added texture and richness.
Cultural Serving Suggestion: Traditionally, Pho Ga is served with hoisin sauce and sriracha on the side, allowing diners to personalize their flavor profile.
Nutritional Facts
Per serving (based on 6 servings), here’s an approximate nutritional breakdown for Pho Ga:
- Calories: 380
- Protein: 30g
- Carbohydrates: 45g
- Fat: 10g
- Fiber: 3g
- Sugar: 2g
- Sodium: 950mg
Dietary Tags: Gluten-free (if using gluten-free noodles), high-protein, low-fat.
Storage and Reheating Tips
Pho Ga can be stored in the refrigerator for up to 3 days in an airtight container. For longer storage, consider freezing the soup in freezer-safe containers, where it can last for about three months. When you’re ready to enjoy your Pho Ga again, reheat gently on the stove over medium heat, adding a splash of water if the broth has thickened. You can also use a microwave safely but do so in intervals to avoid overheating.
Reheating Methods:
- Stovetop: Heat in a saucepan on medium, stirring occasionally until warmed through.
- Microwave: Place in a microwave-safe bowl, cover, and heat in short bursts of 1-2 minutes, stirring between intervals.
- Oven: Preheat to 350°F (175°C) and warm in an oven-safe dish, covered with foil, for about 15-20 minutes.
- Air Fryer: Put the soup into an oven-safe dish, cover with foil, and air fry at 350°F (175°C) for about 10-15 minutes.
Shelf Life Tip: Always ensure the soup is cooled down before refrigerating or freezing to maintain freshness.
Serving Suggestions
For the best experience, serve your Pho Ga piping hot, with bowls ready for customization. Complement the rich broth with sides of lime wedges, sliced chili, and fresh herbs for that authentic touch. Pair your meal with a crisp salad or spring rolls for a complete Asian-inspired dining experience.
Cultural Variation: In Vietnam, it’s common to enjoy Pho Ga alongside a refreshing drink like iced jasmine tea or coconut water.
Reader Tips or Helpful Notes
Here are ten reader-inspired tips that can enhance your Pho Ga experience:
- Shortcut: Use pre-cooked rotisserie chicken for an even quicker broth without compromising flavor.
- Ingredient Upgrade: Opt for organic chicken and fresh herbs for the best flavor and nutritional profile.
- Texture Matters: Always rinse noodles after boiling to maintain their texture; drain thoroughly before serving.
- Season Softly: Be cautious with salt; start with less and adjust, as broth flavors intensify as they simmer.
- Spice Adjustments: If you’re sensitive to strong flavors, reduce spices by half initially and adjust to taste later.
- Make it your own: Experiment with vegetables like bok choy or mushrooms in the broth for added nutrition!
- Storage Hack: Use ice cube trays for freezing broth; a cube or two can quickly elevate a dish or sauce later.
- Flavor Boost: Incorporate a splash of fish sauce for deeper umami flavor in the broth.
- Meal Prep Idea: Prepare the broth ahead of time to have quick meals ready during a busy week.
- Avoid Overcooking Chicken: Remove the chicken from the heat as soon as it’s done; overcooked chicken can dry out.
Recipe FAQs
-
Can I make this ahead of time?
Absolutely! The broth can be made a day in advance for deeper flavor, and the chicken can be shredded and stored separately from the noodles. -
Can I freeze it?
Yes, Pho Ga freezes well! Just make sure to store the broth, chicken, and noodles separately to maintain best quality. -
How can I make it vegan/gluten-free?
For a vegan version, substitute chicken with tofu or shiitake mushrooms and use vegetable broth. Use rice noodles for gluten-free. -
Can I double the recipe?
Yes, this recipe easily scales. Just be sure to use a larger pot to accommodate the increased volume. -
Is it spicy/kid-friendly?
Pho Ga can be mild or spicy depending on what chili garnishes you add; it can be adjusted easily to suit kid tastes. -
What are the best storage containers?
Airtight glass containers are great for storing leftovers; avoid plastic for long-term storage if possible! -
How long can I leave it out before refrigerating?
To ensure food safety, do not leave your soup out for more than two hours at room temperature. -
Can I use an air fryer/Instant Pot instead?
Indeed! The Instant Pot can be fantastic for rapid broth cooking; just follow your manual for pressure cooking times. -
What are the most common mistakes to avoid?
Ensure to skim the foam from the broth and keep the heat low to avoid overcooking chicken or boiling off flavors. -
How do I scale this for a party or meal prep?
Prepare a larger batch and consider making the broth and chicken in advance. Set up a Pho bar with customize-able ingredients!
Conclusion
Now that you’ve unravelled the secrets to making the perfect Pho Ga, we encourage you to try your hand at this delightful recipe. Your family and friends will love this cozy and satisfying bowl of goodness. Share your experience with us in the comments! Don’t forget to snap a picture and share it on social media; your culinary achievements deserve to be celebrated. Happy cooking!
