Table of Contents
Introduction
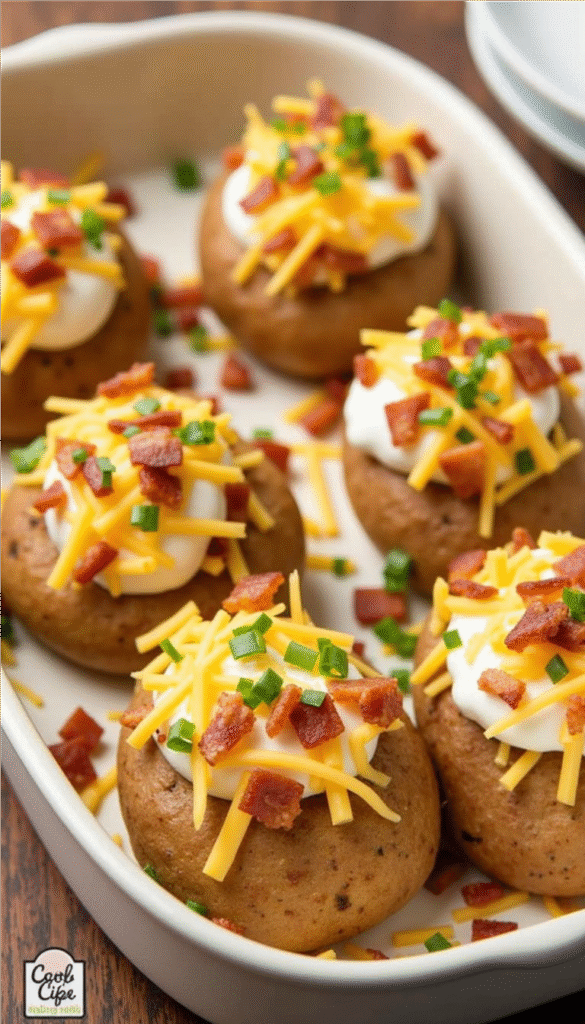
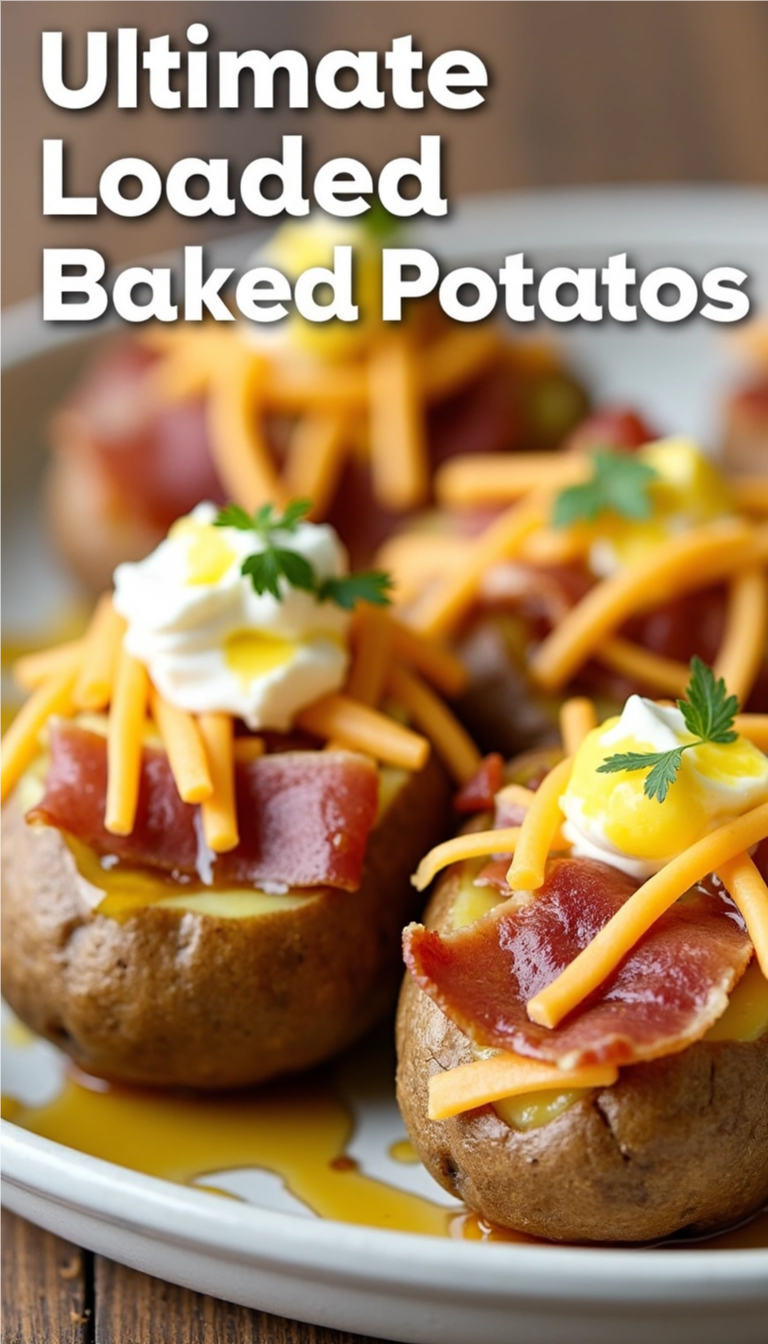
There are comfort foods… and then there are Ultimate Loaded Baked Potatoes: 5 Irresistible Toppings You’ll Love! We’re talking golden skins that crackle as your fork breaks through, a soft, steamy, cloud-like interior that makes you sigh before you even take the first bite, and all those swoon-worthy toppings melting together into pure cozy bliss.
This is not your average side dish. This is a full-on moment. A vibe. A hug in food form that just so happens to be customizable, budget-friendly, and 100% TikTok-worthy. Whether you’re hosting a girls’ night in, putting together a casual date-night spread, or needing the ultimate football Sunday food, loaded baked potatoes are the unsung heroes that deliver every time.
And the best part? They’re endlessly versatile. From classic cheddar and bacon to veggie-packed, BBQ-inspired, or even Tex-Mex twists, this one potato recipe has the power to satisfy literally everyone.
Budget Information
The total cost for this Loaded Baked Potatoes recipe is approximately $10, which breaks down to about $2.50 per serving (serves 4). Here’s a quick breakdown of the costs:
- 4 large russet potatoes: $4.00
- 3 tablespoons olive oil: $0.30
- ¼ teaspoon kosher salt: $0.02
- ¼ teaspoon ground black pepper: $0.02
- 4 oz sharp cheddar cheese: $1.50
- 4 tablespoons butter: $0.60
- 6 slices of bacon: $2.00
- ⅔ cup sour cream: $1.00
Why This Recipe Works
This recipe works wonders because it combines textures and flavors that just sing together! The russet potatoes turn perfectly fluffy inside while the skin crisps up to create that irresistible crunch. Adding salty, crispy bacon and gooey cheese gives each bite complexity, while the sour cream adds a refreshing creaminess. Together, they offer a comforting harmony that you’ll find hard to resist!
Let’s talk texture science for a sec. A truly great loaded baked potato hits that balance between:
✨ Crispy, salty skin that crunches just right
✨ Fluffy, cloud-like insides that soak up toppings
✨ Gooey melted cheese that pulls like a pizza slice
✨ Savory-salty bacon and creamy-cool sour cream that make each bite layered and addictive
The trick is simple: ditch the foil (it steams, ew) and rub your russets with oil + salt. Bake them naked and proud, and you’ll get that shattery shell that makes every bite taste like comfort food heaven.
Ingredients + Optional Substitutions
To whip up these glorious loaded baked potatoes, gather the following ingredients:
- 4 large russet potatoes ($4.00)
- 2 to 3 tablespoons olive oil ($0.30)
- ¼ teaspoon kosher salt ($0.02)
- ¼ teaspoon ground black pepper ($0.02)
- 4 oz sharp cheddar cheese, freshly shredded ($1.50)
- 4 tablespoons butter, sliced ($0.60)
- 6 slices of crispy bacon, cooked and chopped ($2.00)
- ⅔ cup sour cream ($1.00)
If you want to get creative, here are some optional toppings to consider:
- Chopped chives
- Fresh or frozen broccoli florets
- Diced green onions
- Chili or pulled pork
Ultimate Loaded Baked Potatoes: 5 Irresistible Toppings You’ll Love!
Okay, let’s get to the good stuff—the toppings. Because while the potato itself is divine, the toppings are where you get to show off your personality. Here are five toppings you need to try:
-
🥓 Classic Bacon & Cheddar
The OG combo. Salty bacon crumbles, melty sharp cheddar, a dollop of sour cream, and chives. Perfection. -
🥦 Broccoli & Cheese
Sneaky veggies meet indulgence. Tender broccoli florets smothered in gooey cheddar sauce make this feel balanced and indulgent all at once. -
🌶️ Chili & Sour Cream
A full-on meal. Rich chili ladled over a potato, topped with sour cream and shredded cheese. Cozy, hearty, and perfect for cold nights. -
🍖 BBQ Pulled Pork & Green Onions
A smoky-sweet twist that tastes like summer but works year-round. The tangy BBQ sauce + fluffy potato combo = pure magic. -
🥑 Avocado, Salsa & Pepper Jack
Your Tex-Mex potato glow-up. Creamy avocado, spicy cheese, and fresh salsa for a zesty, colorful, Instagrammable plate.
👉 Hosting tip: Create a DIY potato bar with all these toppings and let your guests pile on their faves. It’s interactive, fun, and guaranteed to be a hit.
Mix and match to suit your preferences and dietary needs!
Step-by-step Recipe Instructions
Yield: 4 servings
Step 1: Preheat your oven to 425°F (220°C). This temperature is perfect for getting those potato skins nice and crispy while ensuring the insides are fluffy and tender. As the oven heats, take a moment to wash your russet potatoes thoroughly, scrubbing away any dirt and impurities because those skins will be part of the flavor!
Step 2: Now, poke each potato with a fork a few times. This step is crucial; it prevents the potatoes from bursting in the oven! Next, rub each potato generously with olive oil, and sprinkle kosher salt and black pepper, making sure every surface is coated. This will enhance the flavor and crispiness once baked.
Step 3: Place your seasoned potatoes directly on the middle oven rack, ensuring they’re not touching for even cooking. Allow them to bake for about 60 minutes. The aroma wafting through your kitchen will be heavenly! You’ll know they’re ready when a fork slides in easily.
Step 4: While the potatoes are baking, cook the bacon until crispy in a skillet over medium heat. Once cooked, transfer your bacon to a paper towel-lined plate to absorb excess grease. Set it aside for some serious crunch later!
Step 5: Once your baked potatoes are nice and tender, carefully remove them from the oven using oven mitts—they’ll be hot! Let them cool for a few minutes while you prepare the toppings. Slice a cozy opening along the top of each potato, pushing the sides slightly to create that fluffy filling pocket.
Step 6: Add a pat of butter to each potato, allowing it to melt into the steaming interior. Then, generously sprinkle a good amount of sharp cheddar cheese over the top—watch it ooze and melt into pure bliss! Top with crispy bacon bits, dollops of sour cream, and any optional toppings you desire. Trust me, the toppings are where you can really make these potatoes shine!
Step 7: Serve your loaded baked potatoes hot and watch as your family digs in. Enjoy every delicious bite of this comforting classic!
Nutritional Facts
Calories: 480
Protein: 15g
Carbohydrates: 55g
Total Fats: 25g
Saturated Fat: 10g
Fiber: 5g
Sugar: 2g
Sodium: 900mg
Yield: 4 servings
Dietary Tags: Gluten-Free ✅ (as long as the bacon and toppings used are certified gluten-free)
Storage and Reheating Tips
Leftover loaded baked potatoes can be stored in an airtight container in the refrigerator for up to 3-5 days. When you’re ready to enjoy them again, simply reheat them in the microwave for about 2-3 minutes or until warmed through. If you’re feeling fancy, throw them back in the oven at 350°F for about 15-20 minutes to get the skins crispy again!
-
Fridge: Store for 3–5 days, wrapped or in airtight containers.
-
Freezer: Freeze plain baked potatoes for up to 6 months. Twice-baked? Freeze before the final cheese topping.
-
Reheat Like a Pro:
-
Oven: 350°F for 20 min = crispy perfection.
-
Air Fryer: 350°F for 5–7 min = next-level crunch.
-
Microwave: Quick fix, cover with damp paper towel, 2 min.
-
Serving Suggestions
The beauty of the loaded baked potato is its incredible versatility—it can play multiple roles on your culinary stage. As a hearty main course, serve one potato per person alongside a crisp green salad like a classic Caesar or a simple arugula salad with lemon vinaigrette to cut through the richness. For the ultimate comfort food experience, pair it with a bowl of tomato soup or roasted vegetable soup for dipping.
When serving as a substantial side dish, these potatoes shine alongside grilled or roasted meats. They’re spectacular with a perfectly cooked ribeye steak, grilled pork chops, or roasted chicken. For a vegetarian feast, serve alongside roasted vegetables like asparagus, Brussels sprouts, or broccoli. The potato’s richness complements simply prepared proteins beautifully.
Create a loaded potato bar for parties or family dinners—bake several potatoes and set up bowls with various toppings so everyone can customize their creation. Beyond the classic toppings, offer options like steamed broccoli, sautéed mushrooms, chili, pulled pork, salsa, guacamole, different cheese varieties, jalapeños, caramelized onions, or different sauces like barbecue or ranch. This interactive approach makes the meal fun and ensures everyone gets exactly what they crave.
Reader Tips or Helpful Notes
If you’re in a rush, you can microwave the potatoes instead of baking them. Just remember to poke holes and wrap them in a damp paper towel—this usually takes about 8-10 minutes depending on the potato size. And don’t shy away from experimenting with toppings; the sky’s the limit when it comes to loading up these beauties!
-
Size Matters: Choose potatoes that are similar in size to ensure even cooking. Large russets (about 8-10 ounces each) work best for a substantial meal.
-
Crispy Skin Secret: Rubbing the skins with oil and salt is non-negotiable for that perfect crackly texture. Skip the foil wrapping to avoid steamed, soggy skins.
-
Emergency Shortcut: Short on time? Microwave potatoes for 5 minutes, flip, then microwave another 5 minutes before finishing in a 400°F oven for 15 minutes to crisp the skins.
-
Flavor Boost: Add seasonings like garlic powder, smoked paprika, or onion powder to the oil-rubbed skins before baking for extra flavor dimension.
-
Cheese Wisdom: Shred your own cheese from a block—pre-shredded cheeses contain anti-caking agents that can affect meltability.
-
Bacon Hack: Bake bacon on a foil-lined sheet alongside the potatoes for easy cleanup and perfectly flat, crispy strips.
-
Creamier Filling: For extra creamy twice-baked potatoes, add a splash of heavy cream or half-and-half to the potato mixture before returning it to the skins.
-
Make-Ahead Magic: Bake potatoes up to 3 days ahead, store in the refrigerator, then reheat and add toppings when ready to serve.
-
Vegetable Boost: Stir finely chopped steamed broccoli or cauliflower into the potato mixture for a hidden vegetable upgrade.
-
Crispy Top Trick: For an extra-textured topping on twice-baked potatoes, create a criss-cross pattern with a fork before the second bake, or broil briefly at the end for added color.
Recipe FAQs
Q1: Can I use other types of potatoes?
A: Absolutely! While russet potatoes are the best for this recipe, you can use Yukon Gold or sweet potatoes for a different spin. Just keep an eye on the baking time as it may vary.
Q2: How do I make these potatoes vegan?
A: To make vegan loaded baked potatoes, swap the butter for vegan margarine, use dairy-free cheese, and replace sour cream with a plant-based alternative. They’ll still taste amazing!
Q3: Can I prepare these potatoes ahead of time?
A: Yes! You can wash and poke the potatoes a day ahead. Just keep them in the fridge. Bake them straight from the fridge time when you’re ready to serve.
Q4: Are loaded baked potatoes healthy?
A: While they can be a bit indulgent due to toppings, potatoes are mostly nutritious and provide fiber, vitamins, and minerals. You can control the toppings to make it healthier!
Q5: What’s the best way to store leftover toppings?
A: Store leftover toppings in separate airtight containers in the fridge. Cheese and sour cream can usually last for up to a week!
Conclusion
At the end of the day, Ultimate Loaded Baked Potatoes: 5 Irresistible Toppings You’ll Love! are so much more than a meal—they’re a mood. A customizable, affordable, and ridiculously cozy comfort food that you’ll crave again and again.
From bacon-cheddar classics to Tex-Mex glow-ups, every variation is proof that sometimes the simplest ingredients create the most unforgettable bites. So grab your russets, line up those toppings, and let your potato imagination run wild.
And hey, when you make them? Don’t forget to share your loaded potato pics with me. Because I’m fully ready to hype up your creations. 💕
Printable Recipe Card
Want just the essential recipe details without scrolling through the article? Get our printable recipe card with just the ingredients and instructions.


Comments