
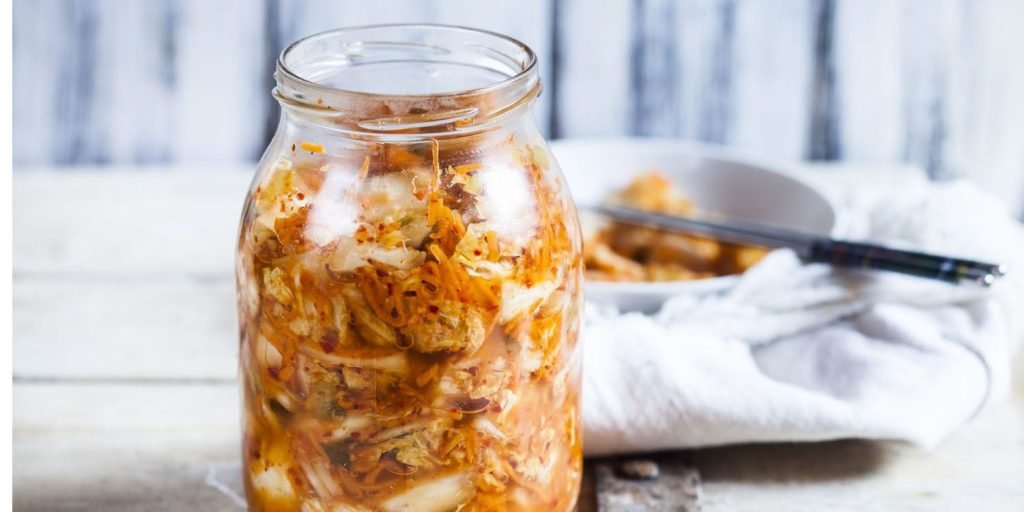
If you’re ready to elevate your meals with a zesty kick, making kimchi at home is your golden ticket! This delightful Korean condiment, made with fermented vegetables, brings a perfect balance of spice, sourness, and umami that complements just about anything. Whether you’re layering it into rice bowls or slathering it on a grilled cheese, this homemade kimchi recipe is simple, customizable, and downright delicious!
Budget Information
Making your own kimchi at home not only allows for customization but is also affordable. The total cost for this recipe is about $15, which serves around 10, bringing the cost to just $1.50 per serving. You can’t beat that for a flavor-packed condiment that enhances every dish!
Why This Recipe Works
This kimchi recipe works so well because it’s rooted in tradition while allowing you to modify it to match your tastes. By fermenting cabbage (or even radishes, if you’re feeling adventurous), you open up the door to a medley of flavors, with the friendly bacteria transforming simple veggies into something utterly captivating. Plus, the versatility in spices makes this a kitchen staple that you’ll find yourself reaching for again and again.
Ingredients + Optional Substitutions
Here’s what you’ll need to make your own kimchi, along with their estimated costs:
- 1 medium Napa cabbage – $3.00
- 1/4 cup sea salt – $0.30
- 4 cups water (for brine) – Free
- 1 small piece of ginger, grated (about 1 tablespoon) – $0.50
- 4 cloves garlic, minced – $0.50
- 1 tablespoon fish sauce (or soy sauce for vegetarian option) – $0.50
- 1 tablespoon sugar – $0.05
- 1/4 cup Korean red pepper flakes (Gochugaru) – $2.00
- 2 green onions, chopped – $0.60
- Optional: carrots, daikon radish, or any veggies you’d like to add – $2.00 (depending on choice)
Feel free to swap out ingredients based on what’s in your fridge or what suits your taste buds!
Step-by-Step Recipe Instructions
Step 1: Start by preparing the cabbage for fermentation. Cut it into quarters lengthwise and remove the core. Then chop the cabbage into bite-sized pieces. In a large bowl, dissolve the 1/4 cup of sea salt in 4 cups of water. Submerge the chopped cabbage in the saltwater brine, ensuring it’s well-coated. Let it sit for about 2 hours, turning occasionally to allow even distribution of salt.
Step 2: Once your cabbage has soaked, rinse it thoroughly under cold water to wash away the excess salt, then drain it well in a colander. You want it to be nice and crisp but not overwhelmingly salty!
Step 3: Now it’s time to create that delightful spice paste! In a separate bowl, mix together the grated ginger, minced garlic, fish sauce (or soy sauce), sugar, and Korean red pepper flakes. This paste is where the magic begins; you want it to be fragrant and slightly pasty.
Step 4: In a large mixing bowl, combine the drained cabbage with the spice paste. Use your hands (wear gloves if you prefer) to massage the paste into the cabbage until every piece is beautifully coated. This step is crucial, as it ensures that all those fiery flavors go right into the vegetables!
Step 5: Finally, add in the chopped green onions and any optional vegetables you’re using, like julienned carrots or chopped daikon radish. Mix everything together well, then pack the mixture tightly into a clean, sterilized jar. Leave about an inch of headspace at the top as it will expand during fermentation.
Step 6: Seal the jar loosely (to allow gases to escape) and let it sit at room temperature for 1 to 5 days, depending on how fermented you like it. Check it daily; you’ll notice the smell becoming more potent, and the color will deepen. Once it reaches your desired tanginess, transfer the jar to the fridge where it can last for several months!
Nutritional Facts
Here’s a quick breakdown of the nutritional values per serving:
- Calories: 50
- Protein: 1g
- Carbohydrates: 10g
- Total Fat: 0g
- Saturated Fat: 0g
- Fiber: 2g
- Sugar: 1g
- Sodium: 350mg
Storage and Reheating Tips
Kimchi allows for easy storage! If kept in an airtight container in the fridge, it can last for several months. Just make sure the veggies stay submerged in the brine to prevent spoilage. As for reheating, kimchi is best enjoyed cold or at room temperature, but if you prefer it warm, briefly sauté it in a pan for a fiery kick in your dishes.
Serving Suggestions
Kimchi is a chameleon in the kitchen! Serve it as a side with your favorite Korean barbecue, pile it onto rice for a basic but tasty meal, or mix it into fried rice for a spicy twist. Feeling creative? Toss it into tacos for a zesty crunch or blend it into a spicy mayo for sandwich spreads. The possibilities are endless!
Reader Tips or Helpful Notes
Experimenting with your kimchi is part of the fun! Don’t hesitate to try different vegetables, swap in more or less spice, or even adjust the fermentation time based on your preferences. Keep notes on what you liked and didn’t like—after a few batches, you’ll have it dialed in just the way you want!
Recipe FAQs
Can I make kimchi without fish sauce? Absolutely! You can use soy sauce or even coconut aminos for a vegan version.
How do I know when my kimchi is ready? Taste is key! Sample it every day. Once it reaches your desired sourness, transfer it to the fridge.
Can I use regular cabbage instead of Napa cabbage? Yes, you can! However, Napa cabbage tends to produce a softer texture that’s characteristic of kimchi.
How spicy is this recipe? This recipe is adjustable. Increase the Gochugaru for heat, or reduce it for a milder flavor!
How long will my kimchi last in the fridge? Properly stored in a sealed jar, your kimchi can last for up to six months, becoming tangier over time.
